Adjusting and exporting
This stage produces filter layers for tone and color above the photo, and a JPEG for the web.
1. Add Curves
Select Retouch. Filters you add from the Filter menu then go directly above Retouch and change both Retouch and the photo (How filters apply).
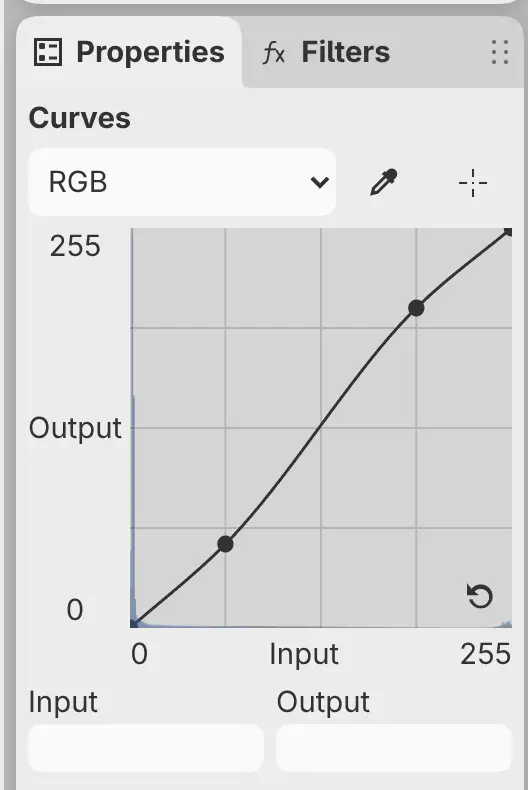
Choose Filter > Tone > Curves. A Curves layer appears above Retouch, and its settings open in the Properties panel. On the RGB curve, add a point in the shadows and drag it down, then add a point in the highlights and drag it up (Tone filters).
2. Add Vibrance
Choose Filter > Color > Vibrance, and set Vibrance to 25 in the Properties panel (Color filters). The Vibrance layer appears above Curves.
3. Select the rock
- Press M, or select Lasso selection in the Tools toolbar, and draw around the rock.
- Choose Select > Feather Selection…, or select Refine in the selection bar and choose Feather… (Working with selections).
- Set Feather radius to 20 px and select Apply.
4. Lift the shadows in the rock
Lifting the shadows of the whole photo would turn the black background gray. The example lifts them in the rock only.
Select Adjust in the selection bar and choose Tone > Shadows/Highlights. Set Shadows to 35% in the Properties panel.
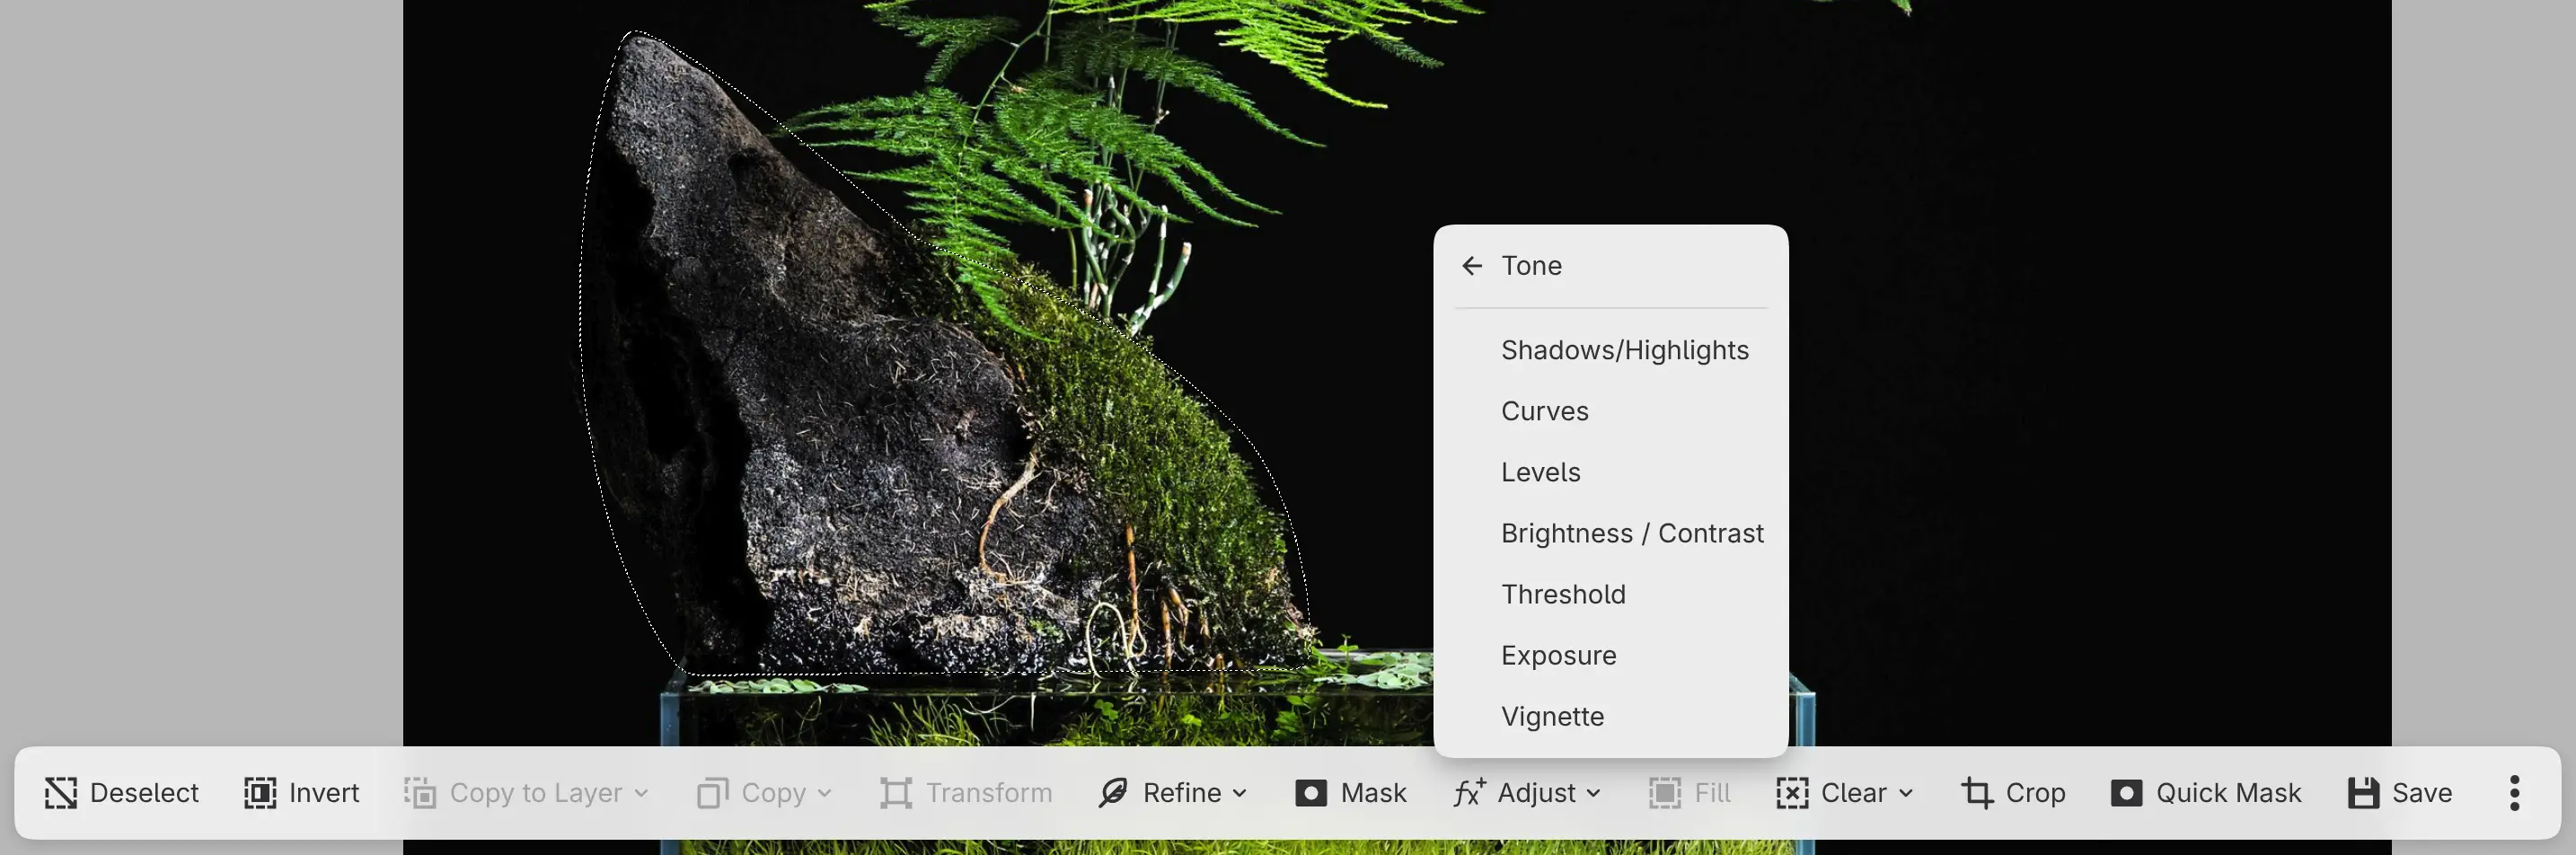
The selection becomes the mask of the new Shadows/Highlights layer. Only the rock changes.
5. Save the drawing
Choose File > Save, or press Ctrl+S. The first save of an opened photo
asks for a folder and a name, as Save As… does. The .capy file keeps the
original photo, the layers, the masks, and the filter layers
(Opening and saving).
6. Export a JPEG
- Choose File > Export…, or press Ctrl+Shift+E.
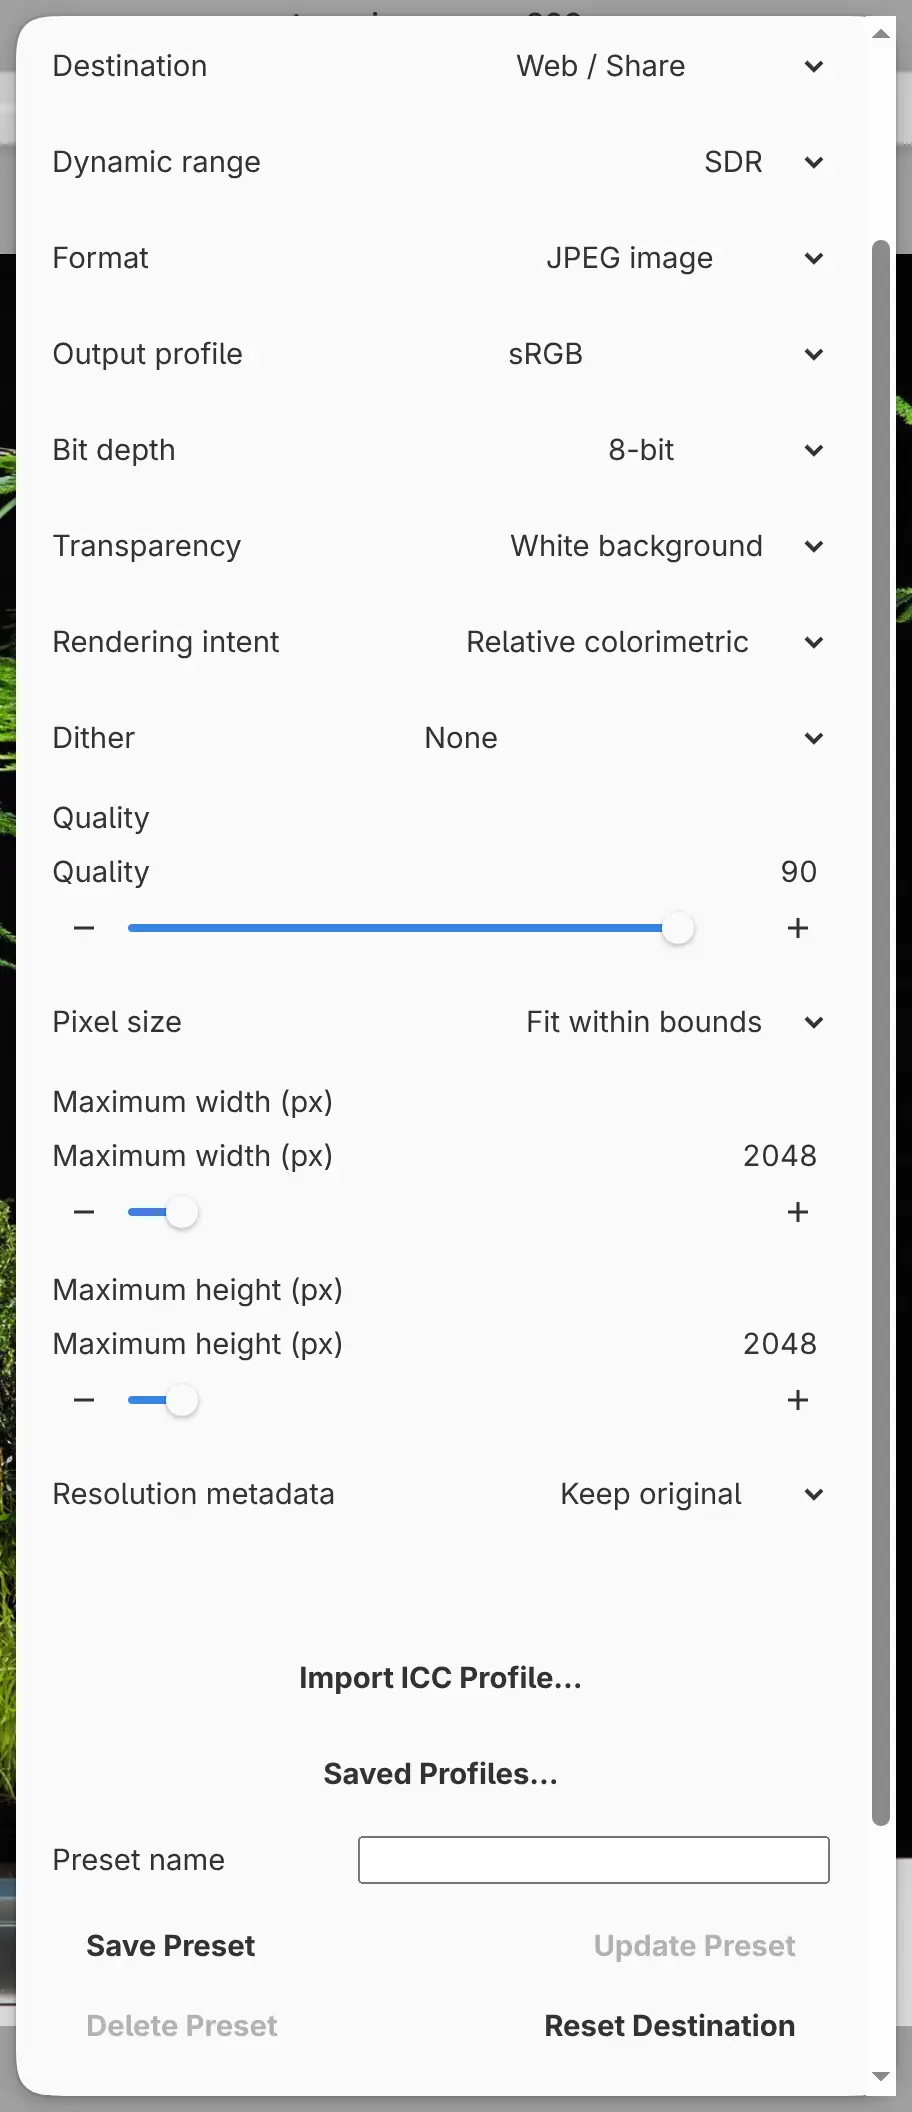
- Leave Destination set to Web / Share, and set Format to JPEG image.
- Set Pixel size to Fit within bounds, and leave Maximum width (px) and Maximum height (px) at 2048.
- Select Choose File…, and choose a folder and a name.
Exporting doesn’t change the drawing (Exporting images).