Layer settings
You can change these settings in the Layers panel header or under Layer Settings in the layer’s menu. The Layer menu has the same items.
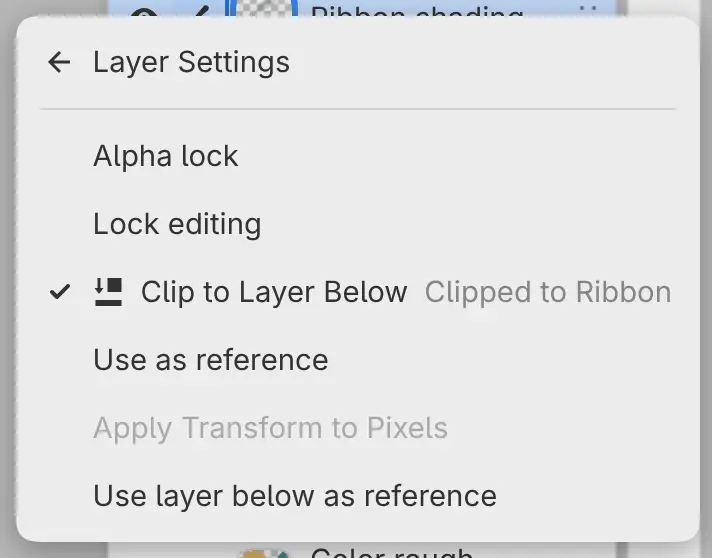
Alpha lock
You can lock the transparency of a paint layer. Brushes then change only pixels that are already painted.
Do one of the following:
- Select the layer, then select Alpha lock in the Layers panel header.
- Open the layer’s menu and choose Layer Settings > Alpha lock.
- Swipe the row to the right with a pen or a finger.
While Alpha lock is on, an alpha lock icon appears at the right of the row.
Fill and Gradient keep the transparency too, and the Eraser has no effect.
Lock editing
You can lock a layer so that it can’t be painted on or changed.
Do one of the following:
- Select the layer, then select Lock editing in the Layers panel header.
- Open the layer’s menu and choose Layer Settings > Lock editing.
- For a selection layer, choose Lock Editing from its menu.
When a layer is locked, a lock icon appears on its row.
You can’t paint on, rename, delete or mask a locked layer, change its opacity or blend mode, or add a filter to it. Locking a group locks every layer in it. You can’t turn off Lock editing on a layer inside a locked group.
Clip to Layer Below
You can clip a layer to limit it to the painted area of the layer below.
Do one of the following:
- Select the layer, then select Clip to Layer Below in the Layers panel header.
- Open the layer’s menu and choose Layer Settings > Clip to Layer Below.
- To add a new clipped layer, choose New > New clipping layer from the layer’s menu.
A rail to the left of the thumbnails joins clipped layers to their base. In the layer’s menu, the item names the base, for example “Clipped to Ribbon”. Moving the base layer moves its clipped layers with it.
You can’t clip to a group set to Pass Through. Turn off Pass Through on the group first.
The base is the nearest unclipped layer below in the same group, skipping selection layers. If that layer is a fill layer or a filter, the item reads No layer below to attach to. On a filter, the item attaches the filter instead (see How filters apply).
Use as reference
You can mark paint layers and groups as references for tools that sample Reference layers, such as Auto select, Fill and the retouching tools.
Do one of the following:
- Select the layers, then select Use selected layers as references in the Layers panel header.
- Open the layer’s menu and choose Layer Settings > Use as reference, or Use selected layers as references with several rows selected.
To stop using a layer as a reference, select only that layer, then select Stop using this layer as a reference in the header, or turn off Use as reference in the layer’s menu.
A lighthouse icon appears on the row button of a reference layer. After you mark layers with the header button, only the active layer stays selected.
Use layer below as reference
You can mark the nearest visible paint layer below the active layer as a reference.
Do one of the following:
- Choose Layer > Layer Settings > Use layer below as reference.
- When a tool samples reference layers and none is marked, select Use layer as Reference in the notice over the canvas.
Pass Through
You can set a group to Pass Through. Its layers then blend directly with the layers below the group, and the group’s opacity and mask fade between that result and the layers below.
Do one of the following:
- Open the group’s menu and choose Layer Settings > Pass Through.
- Choose Pass Through from Layer blend mode in the Layers panel header, or from Blend mode in the Properties panel.
- Swipe the group’s row to the right with a pen or a finger.
A badge appears on the group’s folder, and the subtitle reads “Pass Through”.
Turning off Pass Through sets the group to Normal. A Pass Through group can’t be clipped, be a clipping base or have filters attached. You can’t change Pass Through on a locked group.
New groups use Normal unless Use Pass Through for new groups is on in the Canvas page of Preferences. Grouping layers that use a blend mode other than Normal, or a filter on its own layer, makes the new group Pass Through.
Color mode
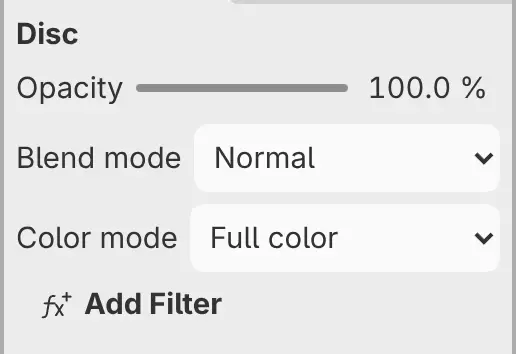
You can store a paint layer in Full color, Grayscale or Two-tone (black & white). Painting on the layer follows the mode.
Do one of the following:
- Select the layer, then choose a mode from Color mode in the Properties panel.
- Type “Color mode” in command search and choose a mode.
Color mode isn’t in the layer’s menu. The row’s subtitle shows the mode when it isn’t Full color.
Changing the mode converts the existing pixels, and returning to Full color doesn’t bring back the original colors. Two-tone makes every pixel black or white, and fully opaque or fully transparent. Color mode is hidden while you paint on the layer’s mask.
Other Layer Settings items
Layer Settings also lists Apply Transform to Pixels (see Move and Transform). On a photo layer, it lists Repair Source Profile…, Rasterize Source… and Revert to Original Photo (see Layer types).