Photo editing tutorial
You edit one photo in three stages in the Photo workspace. Use a photo of your own. The example shows a terrarium with a lava rock and a fern on a black background.
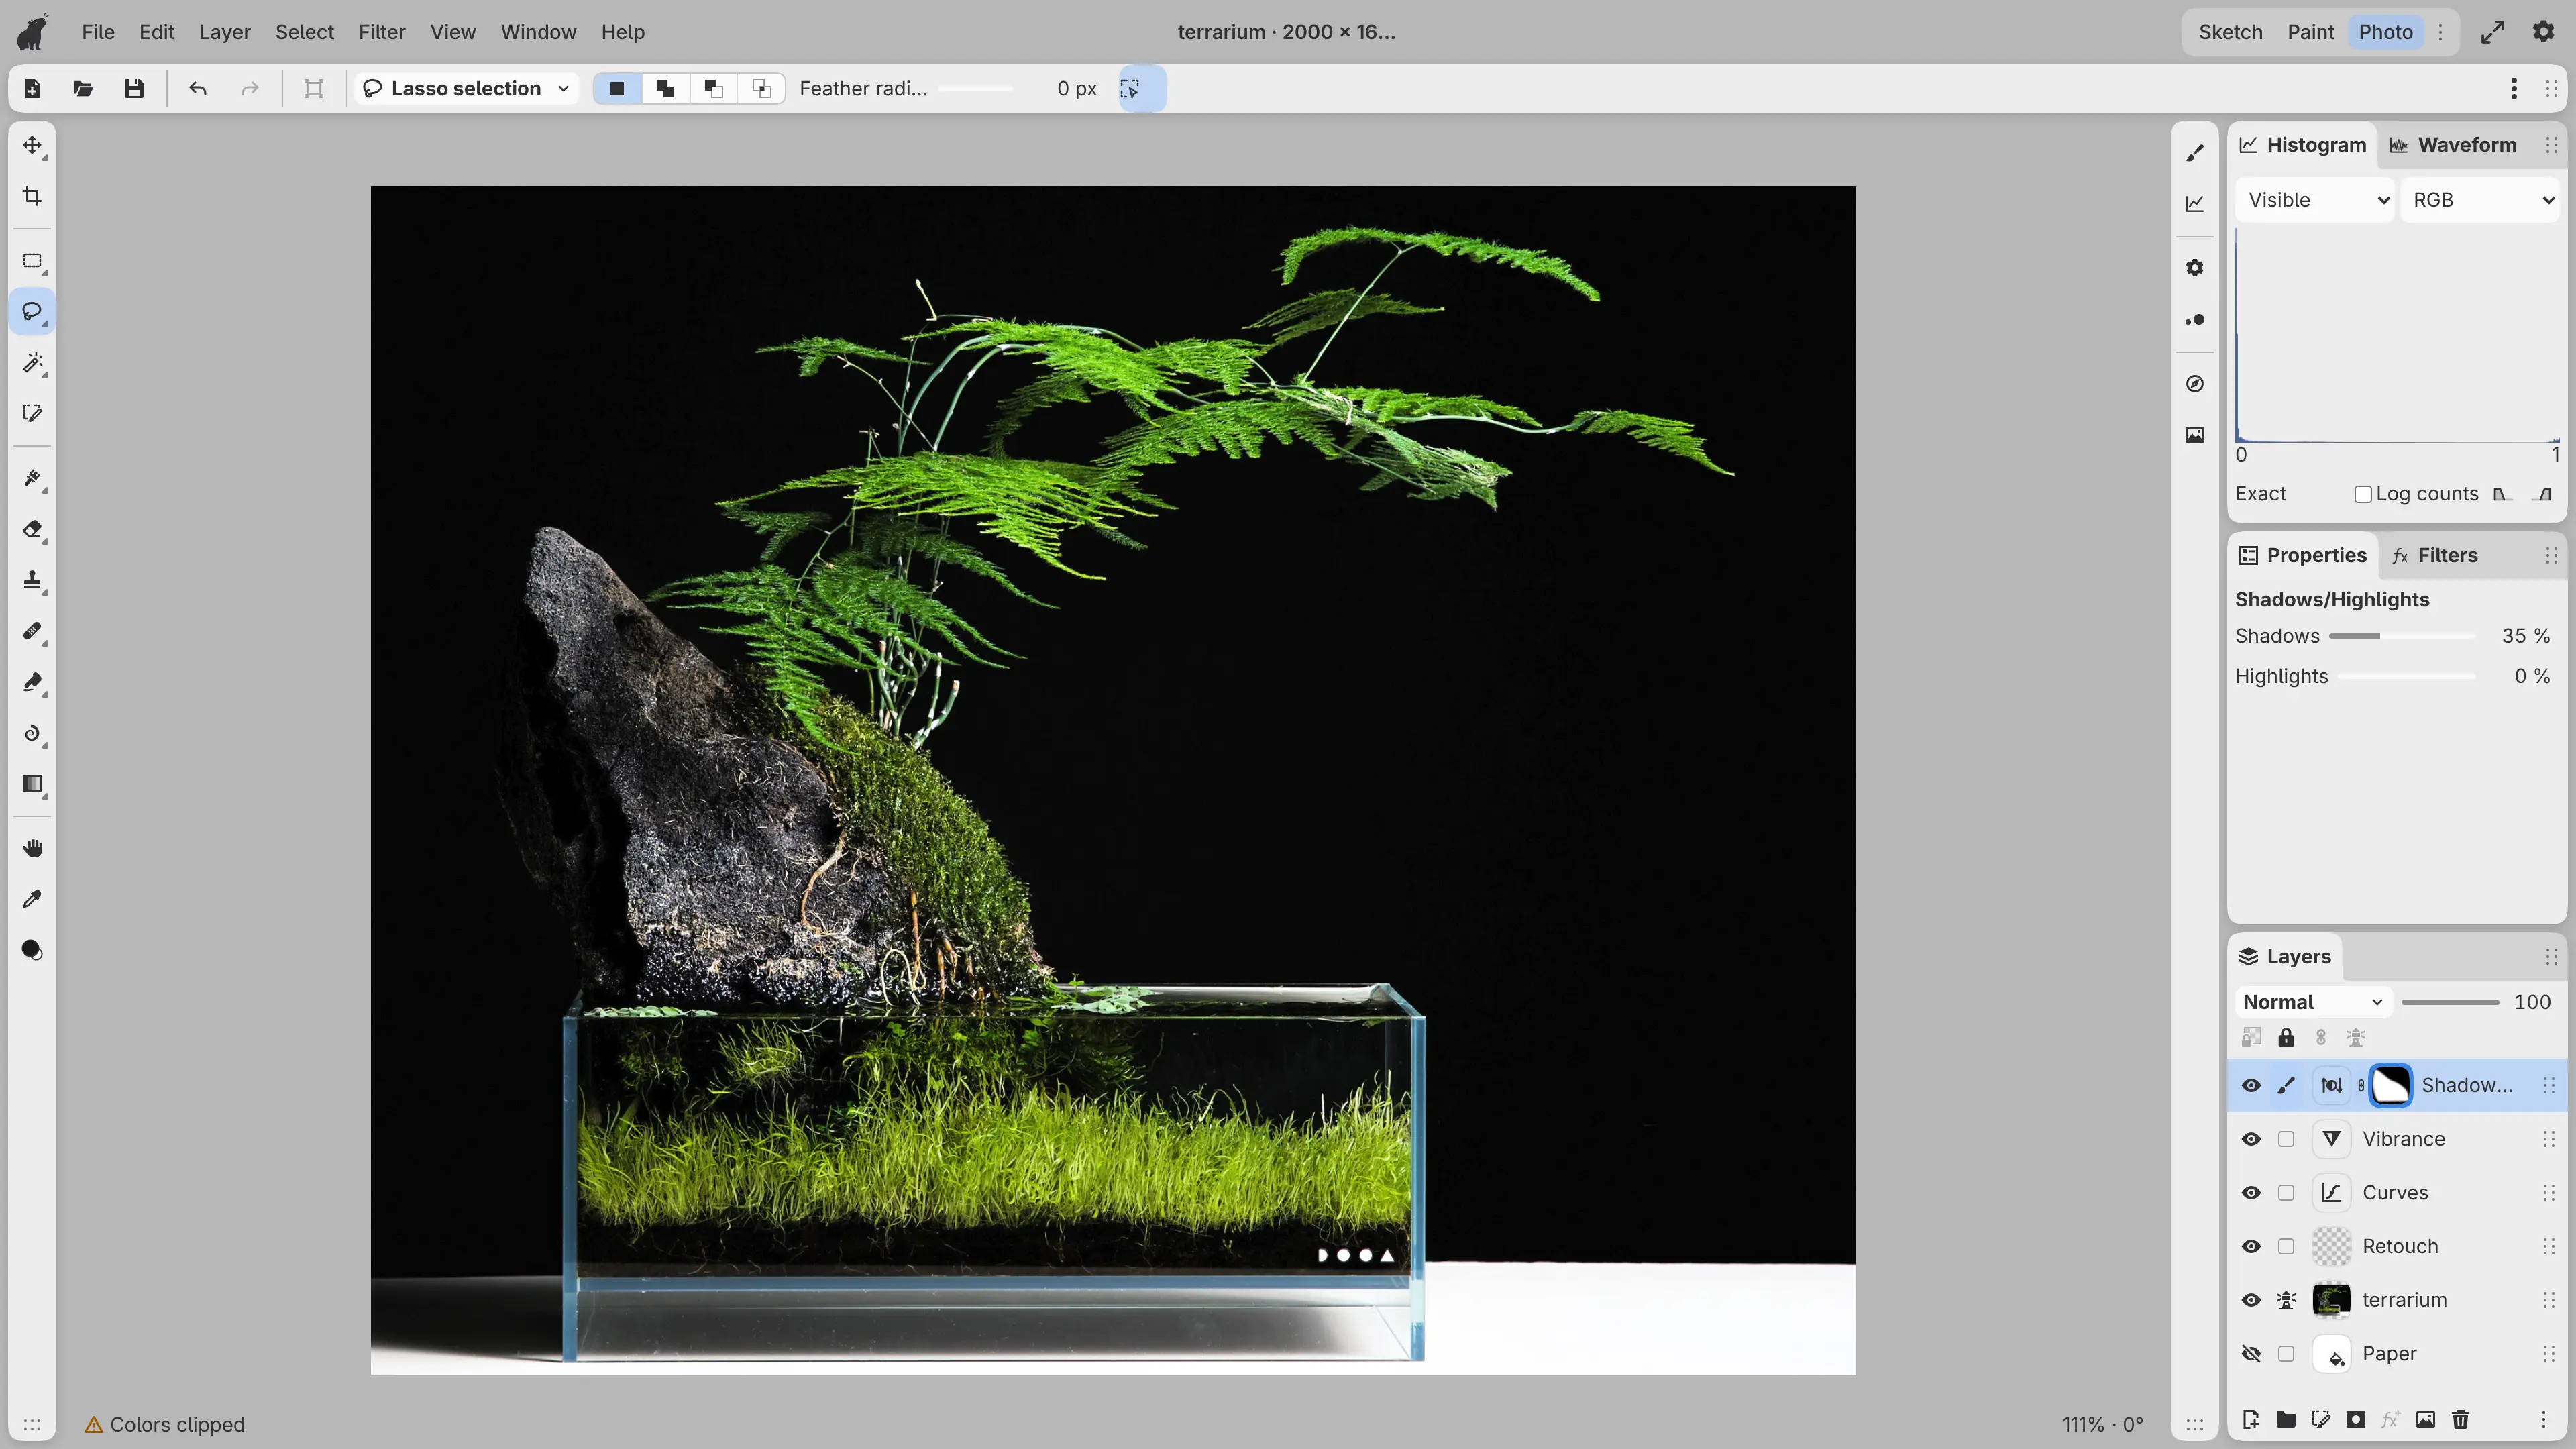
The Photo workspace
Select Photo in the workspace switcher in the title bar. The tutorial uses these parts of the workspace:
- The Tools toolbar at the left, with Crop, the selection tools, and the healing tools.
- Tool Options at the top, with the settings of the current tool.
- The Properties and Layers panels in the right column.
The stages
- Opening and cropping: the photo opened and cropped to 5:4.
- Retouching: dust and a smudge removed on a layer above the photo.
- Adjusting and exporting: Curves, Vibrance, and a local Shadows/Highlights, then a
.capyfile and a JPEG for the web.
The finished layers
The edited photo has these layers, from top to bottom:
| Layer | Contents |
|---|---|
| Shadows/Highlights | Lifts the shadows in the rock, masked to a feathered selection |
| Vibrance | Raises the vibrance of the whole photo |
| Curves | An S curve for the whole photo |
| Retouch | Healing strokes |
| The photo layer | The photo, named after its file |
| Paper | Hidden |
Nothing is painted on the photo layer.
First stage: Opening and cropping.