Rendering
This stage produces the shading of each shape, on layers clipped to its base color, and a PNG export of the study.
1. Add a clipping layer
Select Ribbon, then choose Layer > New > New clipping layer, or choose New > New clipping layer from the row’s menu (Layer settings). Rename the new layer Ribbon shading.
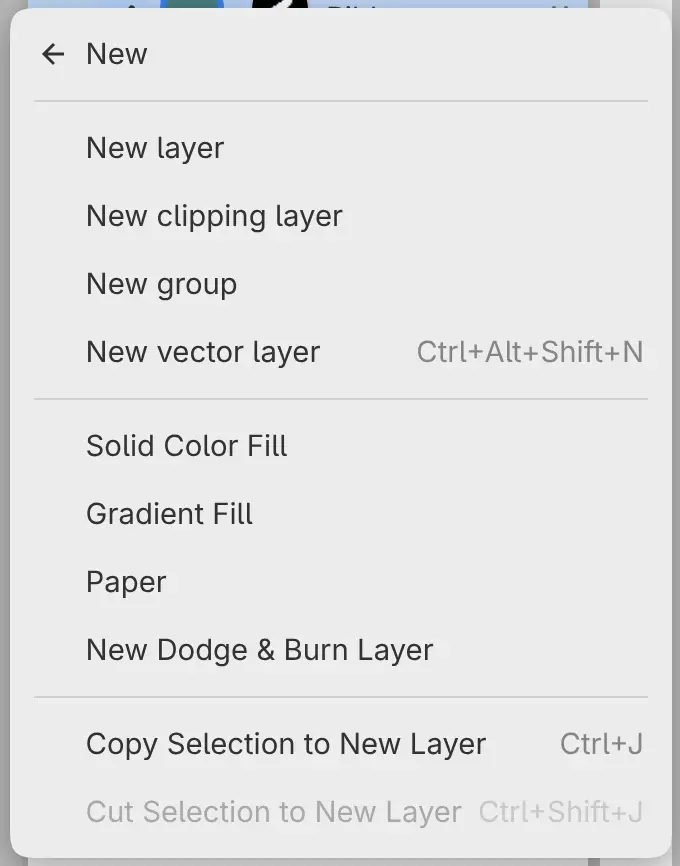
Ribbon shading appears directly above Ribbon, and a rail to the left of the thumbnails marks the clip. The clip follows the mask of Ribbon, not the teal that fills the whole layer.
2. Shade the ribbon
Select Paint Brush in the Tools toolbar and Watercolor Wash in Tool Set (Brush tools). Set Opacity in the Tool panel to 65%, and paint the shadows in the bends of the ribbon in dark blue. Then add sage accents with the Paintbrush brush.
3. Add a texture layer
With Ribbon shading selected, choose Layer > New > New clipping layer again, and rename the layer Ribbon texture. It goes above Ribbon shading, in the same clip. Select Pencil and the Pencil brush, and draw cream hatch marks and highlights.
4. Shade the disc and the block
Select Disc, add a clipping layer named Disc shading, and shade the lower half of the disc with the Airbrush in terracotta. Add a cream highlight at the upper left.
Block shading goes on Block in the same way: dark blue along the right and bottom edges with the Paintbrush brush, then cream hatching with the Pencil brush.
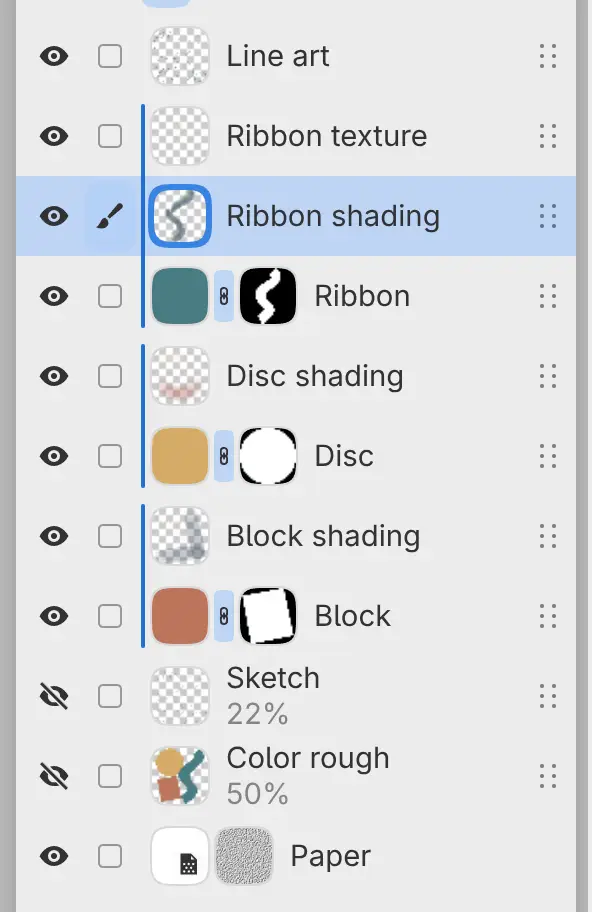
The layer list matches the finished layers in the introduction.
5. Save and export
Choose File > Save, or press Ctrl+S, and save the drawing as a .capy
file (Opening and saving). To export a PNG:
- Choose File > Export…, or press Ctrl+Shift+E.
- Leave Destination set to Web / Share, and set Format to PNG image.
- Select Choose File…, and choose a folder and a name.
After the first export, File > Export Again writes the same file with the same settings, without the dialog (Exporting images).