Color space, bit depth and blending
You can choose a drawing’s color space, bit depth and Blending when you create it, and change them later from the Edit menu.
Color spaces
A drawing’s working color space is sRGB, Display P3, Adobe RGB (1998) or ProPhoto RGB. ProPhoto RGB uses a D50 white point, and the other three use D65.
ICC profiles can’t be working spaces. You can use them for print proofing and export.
Bit depths
A drawing’s bit depth is 8-bit SDR, 16-bit SDR, 16-bit float HDR or 32-bit float HDR. A float depth makes it an HDR drawing, stored as linear RGB in which 1.0 is SDR white at 203 cd/m².
Choosing them for a new drawing
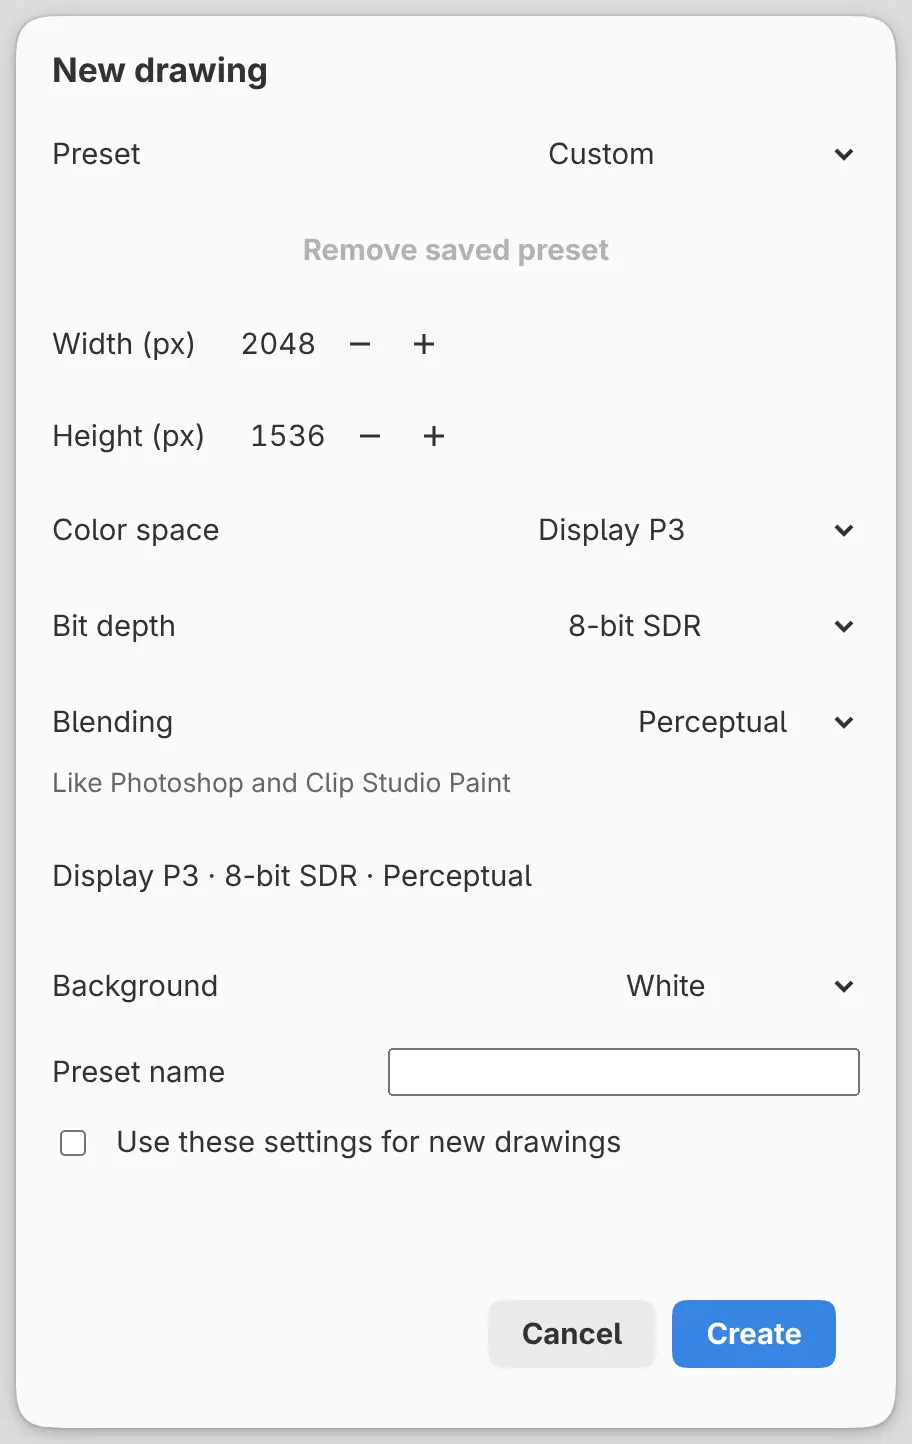
Choose File > New… (Ctrl+N) and set Color space, Bit depth and Blending, or choose a Preset:
| Preset | Color space | Bit depth | Blending |
|---|---|---|---|
| Standard drawing | sRGB | 8-bit SDR | Perceptual |
| Wide color | Display P3 | 8-bit SDR | Perceptual |
| Photo editing | ProPhoto RGB | 16-bit SDR | Perceptual |
| HDR drawing | sRGB | 16-bit float HDR | Linear light |
At a float depth, Blending is fixed to Linear light. Turn on Use these settings for new drawings to make the choices, including Blending, the default for new drawings.
Defaults in Preferences
Choose Edit > Preferences and open the Color page:
- Under New drawings, set the Color space, Bit depth and Background of future drawings. Open drawings don’t change.
- Under Opening photos, set Editing precision (Source depth or 16-bit) and Untagged RGB and grayscale (Assume sRGB or Ask). With Ask, opening an untagged photo shows Choose image interpretation. Tagged photos keep their embedded profiles.
- Select Manage Profiles… to open the Color Profile Library.
Preferences has no Blending setting.
Assign Profile
Choose Edit > Assign Profile… to keep the drawing’s RGB numbers and read them in another working space. Choose the space under Color space, where Adobe RGB (1998) is listed as Adobe RGB. Photo layers keep the source profile of their original photo.
Convert Color Space
Choose Edit > Convert Color Space… to change the RGB numbers so that the colors keep their appearance in another working space, within its gamut.
With Save flattened copy, Apply becomes Save Copy…. The copy has one
layer, with the same size and bit depth. Its file name must end in .capy and
can’t be the open drawing’s file.
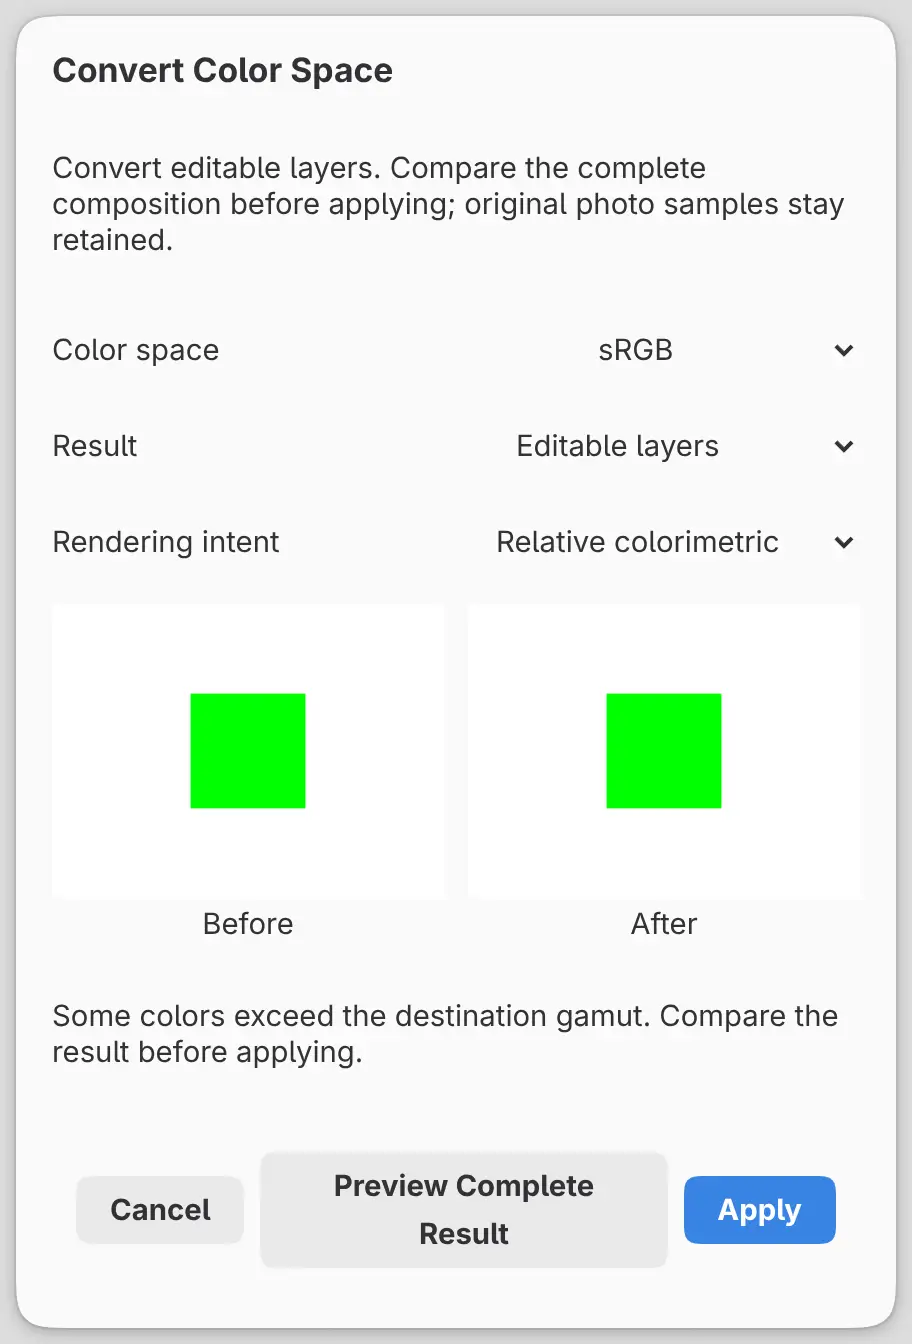
Color space
The working space to convert to. The current space is selected at first.
Result
Editable layers (default) converts every layer in place. Save flattened
copy saves a converted, flattened copy as a new .capy file and leaves the
open drawing unchanged.
Rendering intent
Relative colorimetric (default), Perceptual, Saturation or Absolute colorimetric. Black point compensation is always off.
Change Bit Depth
Choose Edit > Change Bit Depth… to change the stored precision. The color space doesn’t change.
Changing to a float depth makes the drawing HDR and sets Blending to Linear light in the same step. Changing back to an integer depth keeps Linear light until you change Blending. Lowering the depth can clip colors.
Bit depth
The new bit depth. The current depth is selected at first.
Dither
None (default) or Stochastic (8-bit). Dither applies only when the target is 8-bit SDR.
Previewing and applying
To apply Assign Profile, Convert Color Space or Change Bit Depth:
- Set the fields in the dialog.
- Select Preview Complete Result.
- Compare Before and After.
- Select Apply (or Save Copy…).
Apply stays unavailable until the preview is ready, and changing a field discards the preview. If any color clips, the status line reads “Some colors exceed the destination gamut. Compare the result before applying.”
Apply is one undo step. Undo and Redo open Undo Color Change and Redo Color Change. These dialogs apply the change without further input and offer only Cancel.
Blending
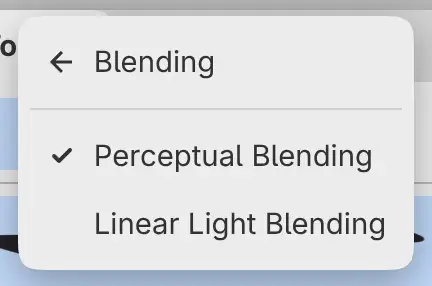
You can combine layers on the drawing’s encoded values or in linear light. Do one of the following:
- Choose Edit > Blending > Perceptual Blending or Edit > Blending > Linear Light Blending.
- Set Blending to Perceptual or Linear light in the New dialog.
Painted pixels keep their values. Blending changes:
- how layers combine;
- how dry brushes lay color over existing paint;
- Gaussian Blur, Unsharp Mask, High Pass, Edge-Preserving Smooth and Soft Focus (Motion Blur, Vignette and Bloom always work in linear light);
- the neutral gray of New Dodge & Burn Layer;
- Frequency Separation…, which needs Perceptual.
Changing Blending is one undo step. HDR drawings always use Linear light, and
both menu items are unavailable. New drawings and photos opened from image
files start with Perceptual. Photos that open at a float depth and .capy files
saved before Blending existed use Linear light.
Document Properties
Choose File > Document Properties… to see the drawing’s Canvas size, Working color space, Bit depth, Blending and Resolution metadata. HDR drawings add HDR reference white. Each original photo in the drawing adds a row with its source profile. You can’t change anything in this dialog.