Toolbars and title bar
Each workspace keeps its own toolbars and title bar. Window > Undo Layout Change (Ctrl+Alt+Z) reverses the last change.
Toolbar menus
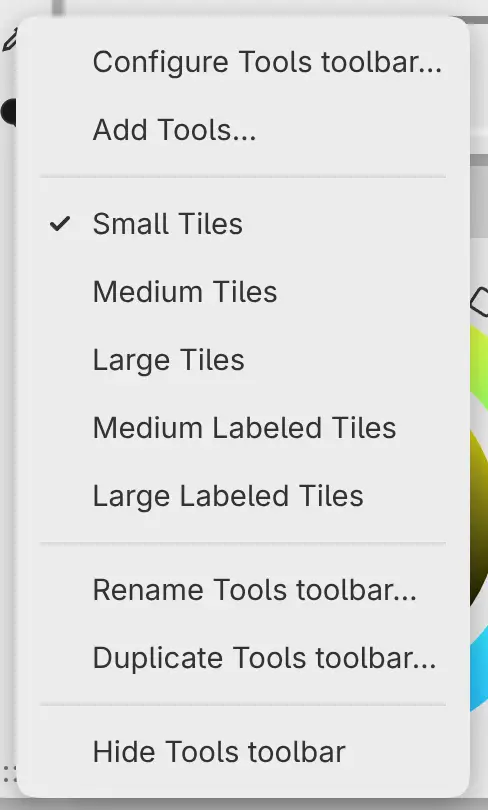
To open a toolbar’s menu, right-click the toolbar’s background or its grip, or hold it with a finger or pen. Right-click or hold a tool for the tool’s menu.
Showing and hiding toolbars
Do one of the following:
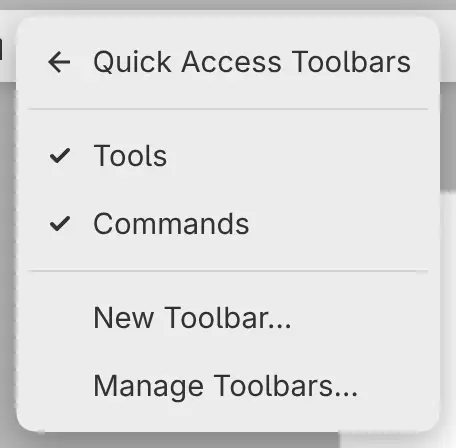
- Choose Window > Quick Access Toolbars and the toolbar’s name. Toolbars on screen have a check mark.
- Choose Hide name toolbar from the toolbar’s menu.
- Type the toolbar’s name in command search.
A toolbar you show again opens at the top edge of the window.
After you delete the Tools or Commands toolbar, Restore Tools or Restore Commands appears in the same submenu. It brings the toolbar back with its starting tools.
New toolbars
Do one of the following:
- Choose Window > Quick Access Toolbars > New Toolbar…. The toolbar opens at the top edge.
- Choose New Toolbar… from the Panel Group menu of a tab group. The toolbar becomes a tab in that group.
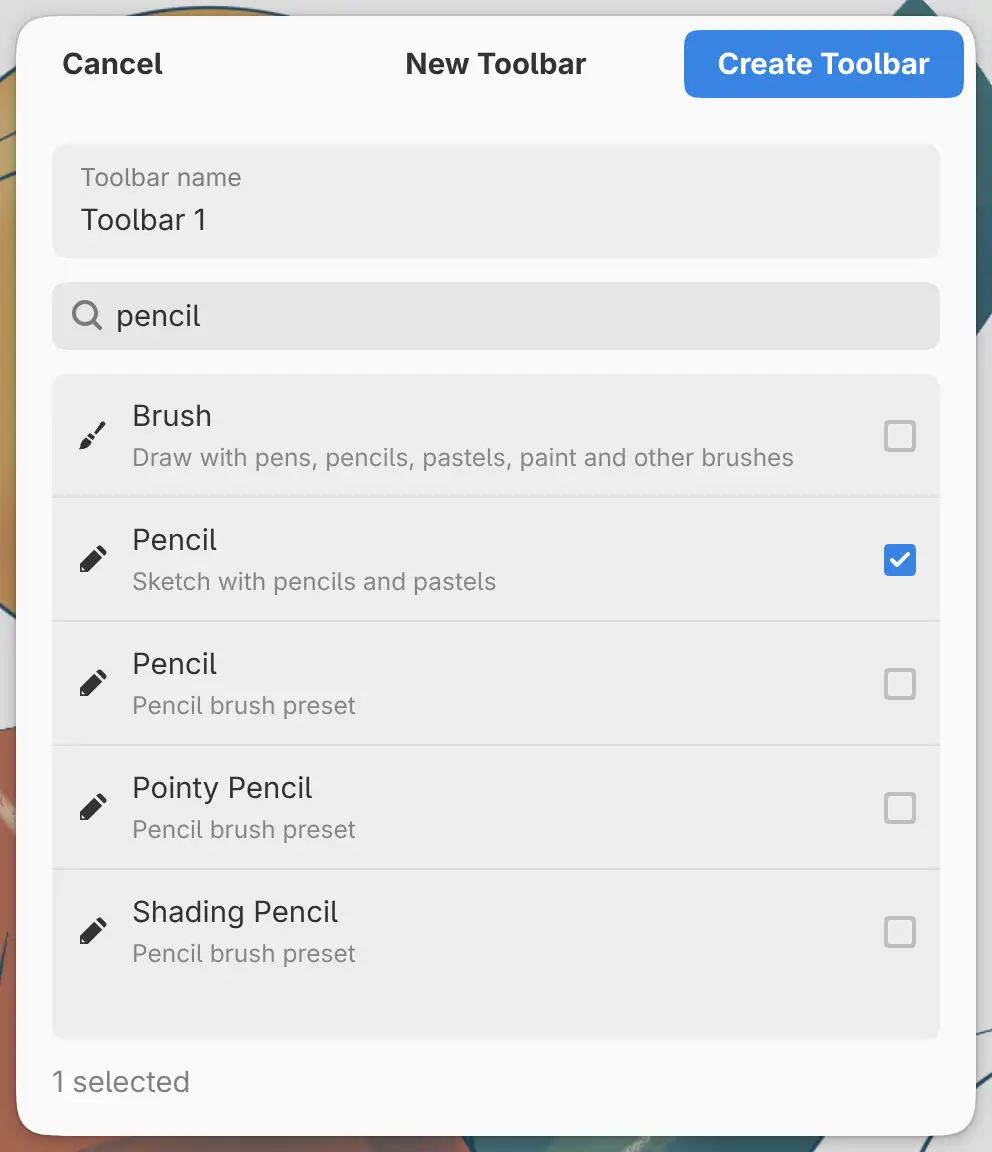
On the web and Android, type a Toolbar name, select the tools to add, and select Create Toolbar. In the Linux, Windows, macOS and iPad apps, type a name, choose Empty toolbar or a saved toolbar under Start with, and select Add to Workspace.
Each toolbar needs a name of its own.
Adding and removing tools
- To add tools at the end, choose Add Tools… from the toolbar’s menu.
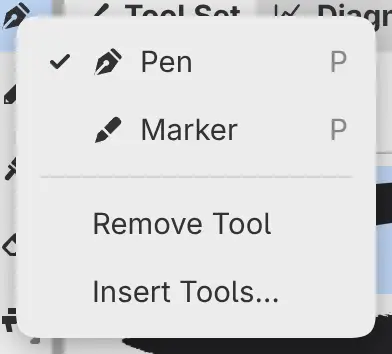
- To add tools before a tool, choose Insert Tools… from that tool’s menu.
- To remove a tool, choose Remove Tool from its menu.
- To move a tool, hold it, then drag it within the toolbar or into another toolbar.
Besides commands and tools, the Add Tools list has brushes, brush sizes, Color Picker, Brush size slider, Brush opacity slider, Tool Options and Divider. It also has an entry for each panel, such as Layers panel, that opens the panel in a drawer.
Tool Options shows the settings of the current tool across the rest of the toolbar. Its menu has Horizontal: Text, Horizontal: Icons and Show Sliders.
Tile sizes
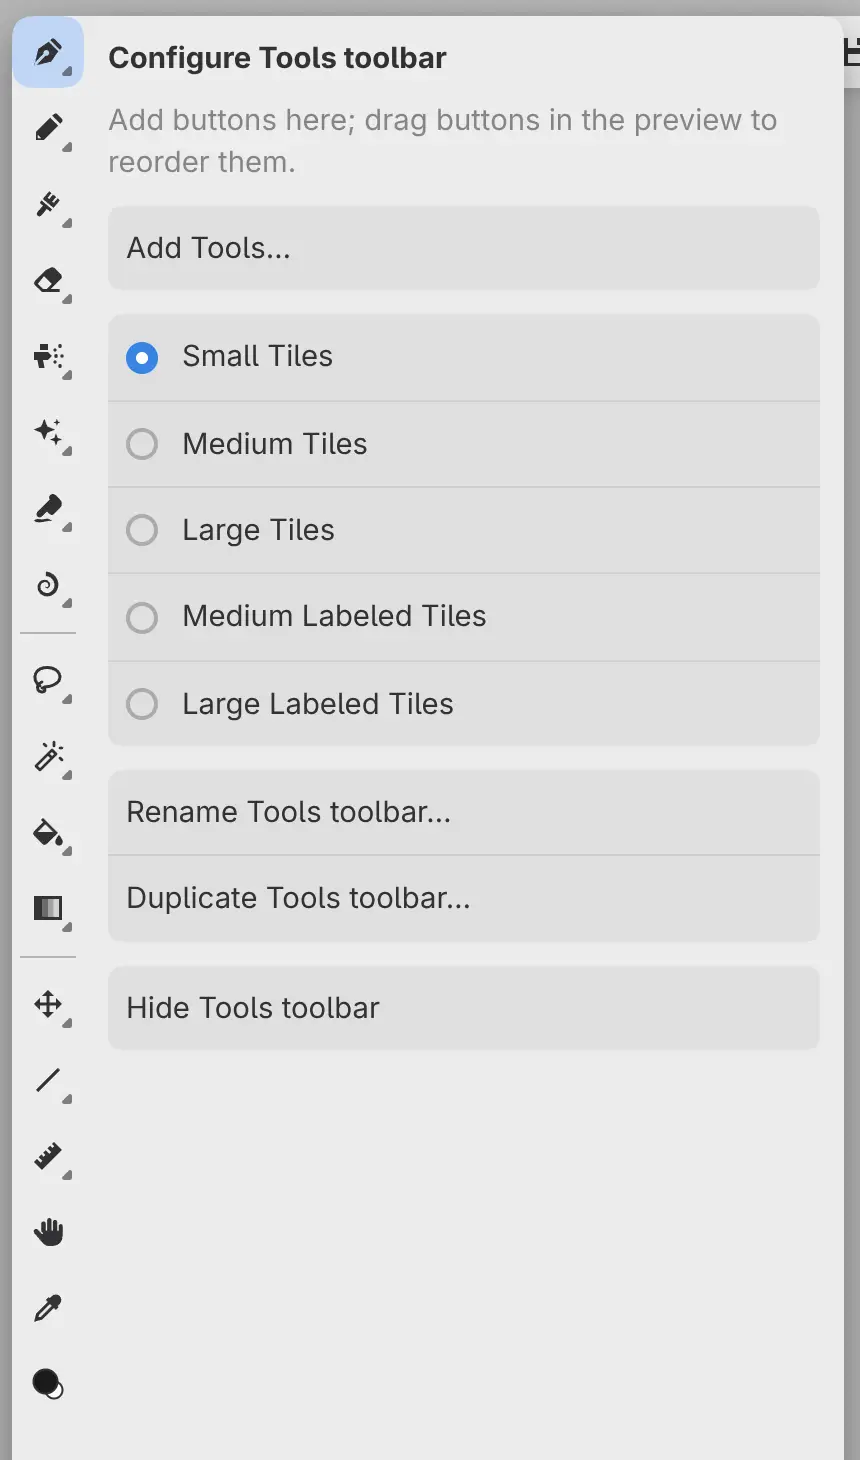
Choose Small Tiles, Medium Tiles, Large Tiles, Medium Labeled Tiles or Large Labeled Tiles from the toolbar’s menu. Labeled tiles show each tool’s name. New toolbars use Small Tiles.
Configuring a toolbar
Choose Configure name toolbar… from the toolbar’s menu. The toolbar opens enlarged, with the commands of its menu in a column beside it. Drag the buttons of the enlarged toolbar to reorder them. Escape closes the column.
Floating toolbars
Double-click the grip of a floating toolbar to switch it between a grid, a column and a row.
Renaming and duplicating toolbars
Choose Rename name toolbar… or Duplicate name toolbar… from the toolbar’s menu. A duplicate has the tools and tile size of the original.
Deleting toolbars
To delete a toolbar:
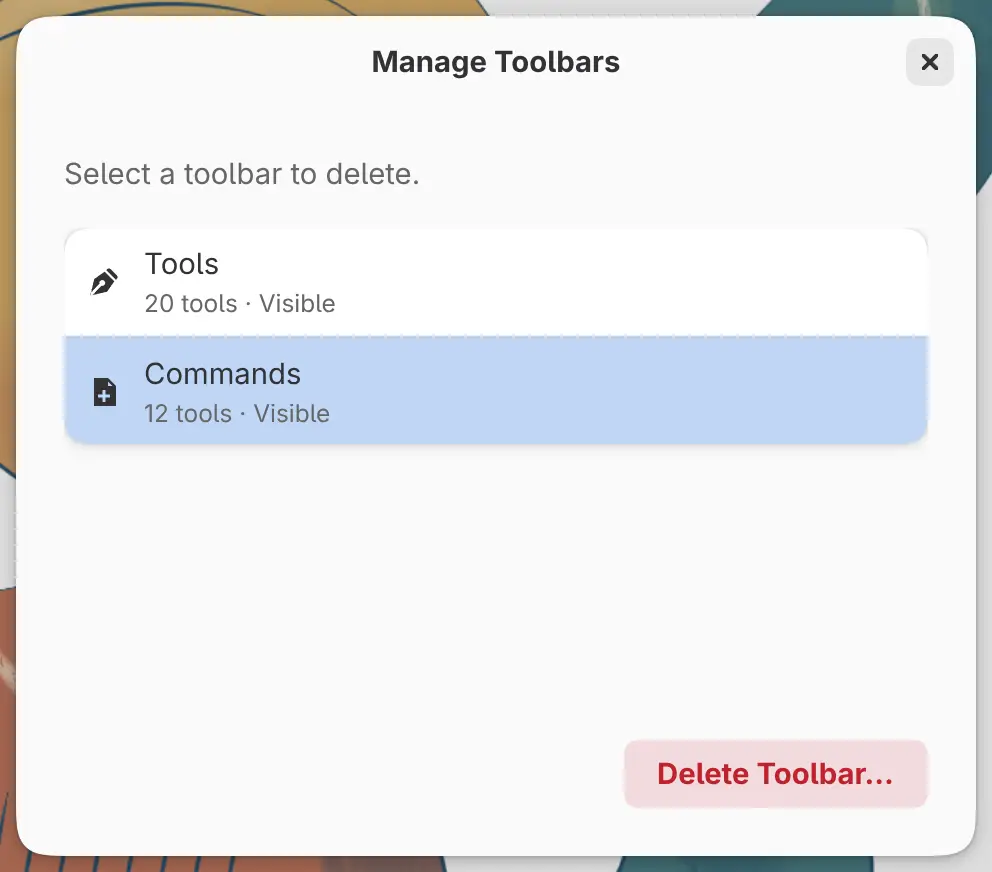
- Choose Window > Quick Access Toolbars > Manage Toolbars….
- Select the toolbar.
- Select Delete Toolbar….
- Select Delete Toolbar to confirm.
Window > Undo Layout Change brings back a deleted toolbar.
Toolbar Library
In the Linux, Windows, macOS and iPad apps, you can save a copy of a toolbar and add it to other workspaces. Choose Save to Toolbar Library… from the toolbar’s menu. To add a saved toolbar, open Manage Toolbars…, go to Saved Toolbars, select the toolbar, and select Add to Workspace.
Customizing the title bar
Do one of the following:
- Choose Window > Customize Title Bar….
- Right-click or hold the title bar, and choose Customize Title Bar….
A bar opens under the title bar with the items you can add.
- To add an item, drag it into the title bar. Selecting an item in the bar does nothing.
- To move an item, drag it to a new place.
- To remove an item, drag it off the title bar, or select it and press Delete.
To add tools, drag Add Tools… into the title bar and choose the tools for that place. The bar also has Small, Medium and Large for the size of the title bar, and Show footer for the bar under the canvas with the zoom and rotation.
Select Done to keep the changes or Cancel to discard them. Until then, single-key shortcuts and command search don’t work.

Title bar items
| Item | What it shows |
|---|---|
| Capy (Zen Mode) | The button for Zen mode |
| Main Menu | One button with every menu (not on macOS) |
| Menu Labels | The menus as a row of names (not on macOS) |
| Settings | A button that opens Preferences |
| Full Screen | A full screen button (web only) |
| Workspace Switcher | A button for each workspace |
| Document Title | The drawing’s name, or a tab for each open drawing |
| Clock, Battery | The time and the battery level |
| Space | An empty gap |
| Tools | Any item from the Add Tools list except the sliders and Tool Options |
On the web and in the Linux, Windows, macOS and iPad apps, Clock and Battery appear only in full screen.
Each item except Space and tools can be placed once. Items that don’t fit move into a … menu.