Selection layers
You can keep a selection as a layer in the Layers panel and load it again later.
Saving a selection
Do one of the following:
- Choose Select > Save as Selection Layer.
- Select Save on the selection bar or on the Quick Mask bar.
- In Quick Mask, choose Layer > Save as Selection Layer.
The new layer goes to the top of the layer list, named Selection and a number. It opens for editing with its name ready to type. Saving from Quick Mask also keeps the Quick Mask overlay color and opacity.
To save into a group, open the group’s menu and choose Save Current Selection in Group….
New Selection Layer
You can start a selection layer empty and paint the selection.
Do one of the following:
- Choose Select > New Selection Layer.
- Select New Selection Layer at the bottom of the Layers panel.
- Open a group’s menu and choose New Selection Layer in Group….
Selection layer rows
A selection layer’s row has a thumbnail of the selection, an eye button that shows or hides its overlay, and a load button beside the thumbnail.
Selecting the row opens the layer for editing. Selection layers have no opacity, blend mode or mask, and you can’t merge them or paint on them outside editing.
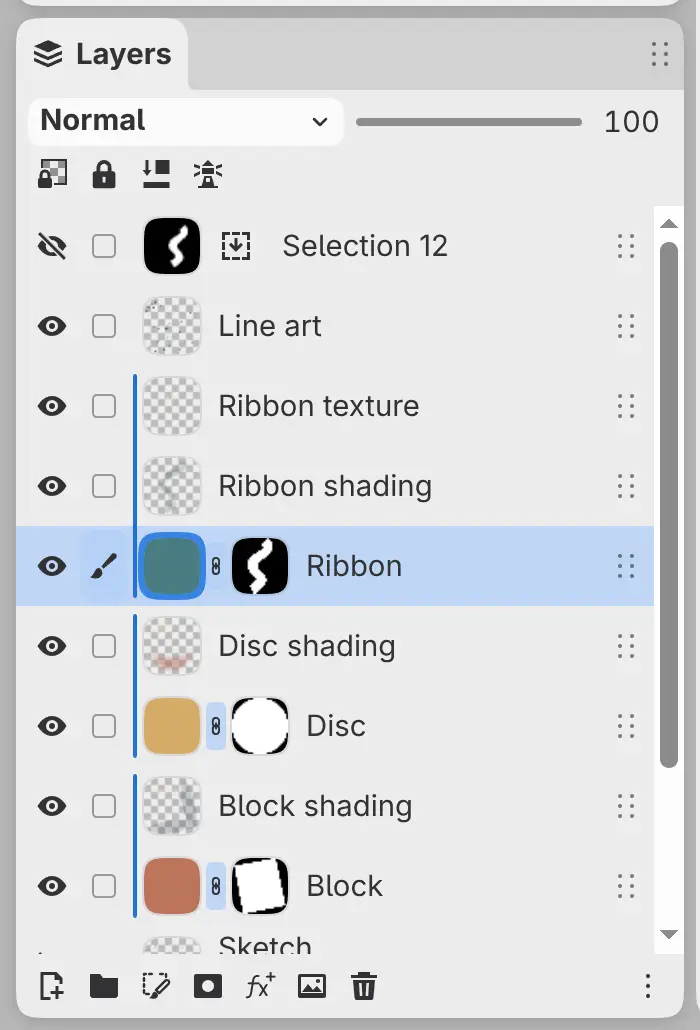
Editing a selection layer
While you edit a selection layer, brushes, Fill and Gradient change the stored selection, as in Quick Mask. The Properties panel shows the layer’s Overlay color and Overlay opacity, and the shared Mode.
The canvas bar at the bottom of the canvas is captioned “Editing” and the layer’s name. With the canvas bar hidden, this bar doesn’t appear.
- Load makes the layer the current selection and returns to the artwork.
- Invert inverts the stored selection and keeps the layer open for editing.
- Return to Artwork ends editing. Escape does the same.
After editing, the layer you edited before becomes active again, or the top paint layer if there was none.
To refine the stored selection, open the selection layer’s menu and choose from Modify. Select > Grow Selection… and the other refine commands in the Select menu return to the artwork first and change the current selection.

Loading a selection layer
Do one of the following:
- Choose Select > Load Selection, choose the layer, and choose Load Selection, Add to Selection, Subtract from Selection, Intersect with Selection or Load Inverted Selection.
- Select the load button on the layer’s row.
- Hold Ctrl and click the layer’s thumbnail. Add Shift to add, Alt to subtract, or Shift+Alt to intersect.
- While you edit the layer, select Load on the canvas bar.
Loading returns to the artwork first. The selection layer stays as it was. Layers in groups are listed under Load Selection by their group path, such as Group 1 / Selection 1.
Replacing a selection layer
To store the current selection in an existing selection layer, choose Select > Replace Selection Layer from Current Selection and choose the layer. You can’t replace a locked selection layer.
Selection layer menu
Right-click or hold a selection layer’s row to open its menu.
- Load Selection: the same five items as in the Select menu.
- Modify: Replace from Current Selection, Invert, Select All, Clear, Fill, Grow…, Shrink…, Feather…, Border… and Smooth….
- Organize: Group Selected Layers, Move to Root, Move Up, Move Down and Move into Group.
- Rename…, Duplicate, Delete and Lock Editing. On a locked layer, Lock Editing reads Unlock Editing.
Modify is unavailable on a locked selection layer. With several layers selected, the menu shows Duplicate Selected Layers and Delete Selected Layers.