Layer types
Paint layer
A paint layer holds painted pixels. Brushes, Fill, Gradient and Figure add pixels only to paint layers.
To add a paint layer, choose Layer > New > New layer, or select New layer at the bottom of the Layers panel.
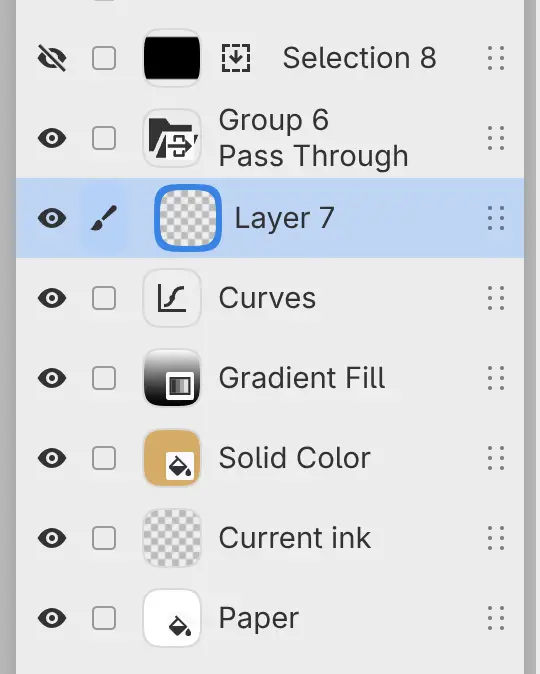
A new drawing starts with an empty paint layer, Current ink, above Paper. Only paint layers have Alpha lock, Color mode, Clear Entire Layer and Apply mask to layer.
Group
A group holds layers in a folder that you can collapse to one row.
Do one of the following:
- Choose Layer > New > New group.
- Select New group at the bottom of the Layers panel.
- Select several rows and choose Layer > Organize > Group selected layers.
Select the folder thumbnail to expand or collapse the group. A badge on the folder marks a group set to Pass Through.
A group combines its layers first and then blends the result with the layers below it, unless it is set to Pass Through. A group has no pixels of its own.
Fill layers
A fill layer covers the canvas with one color (Solid Color) or a gradient (Gradient Fill).
Do one of the following:
- Choose Layer > New > Solid Color Fill or Gradient Fill.
- Choose Filter > Fill > Solid Color or Gradient Fill.
- Select Solid Color or Gradient Fill in the Fill category of the Filters panel.
The fill layer goes above the active layer and the layers clipped to it. A new Solid Color uses the current paint color, and a new Gradient Fill runs from black to white. If a selection is active, it becomes the fill layer’s mask.
To change the color of a Solid Color, select its thumbnail to open Edit Color, or change Color in the Properties panel. Gradient describes the settings of a Gradient Fill.
To paint on a fill layer, add a mask. Brushes paint the mask, not the fill. You can clip a fill layer, but you can’t clip other layers to it or attach filters to it.
Filter layers
A filter layer holds a filter instead of pixels. Its row shows the filter’s icon and name. See Adding filters and How filters apply.
With a filter layer selected, brushes paint on the layer below it, or on the layer it is attached to. If the filter has a mask, brushes paint the mask.
Selection layers
A selection layer stores a selection. To add one, select New Selection Layer at the bottom of the Layers panel.
The button to the right of the thumbnail loads the stored selection. The eye hides or shows the selection overlay on the canvas. A selection layer has no opacity, blend mode, mask, clipping or reference setting, and it can’t be merged. Selection layers covers editing the stored selection.
Paper
Paper is a white Solid Color fill layer at the bottom of a new drawing. You can recolor, hide or delete Paper like any other fill layer.
Paper starts hidden when Background is set to Transparent in the New drawing dialog, and in a photo you open.
Photo layers
A photo layer is a paint layer that keeps the original photo at its own size, bit depth and color profile. Painting and erasing are stored on top of the photo.
To add a photo layer, do one of the following:
- Choose File > Open… and select a photo.
- Choose File > Import Image as Layer….
- Drop an image file on the canvas.
While the original is kept, Layer > Layer Settings lists these commands:
- Revert to Original Photo discards the painting, erasing and applied masks. The position, mask, opacity and blend mode stay, and Color mode returns to Full color.
- Rasterize Source… converts the original to the color space and bit depth of the drawing, at full size. Afterward, Revert to Original Photo is unavailable.
- Repair Source Profile… changes the profile the original is read with: sRGB, Display P3, Adobe RGB (1998) or ProPhoto RGB. If the layer has painting on it, Add Corrected Source adds the corrected photo as a new layer instead.
Revert to Original Photo and Rasterize Source… are also in the Edit menu. Clear Entire Layer discards the original photo too.