Filters and properties
Filters change the appearance of the layer stack. The Filters panel chooses an effect; Properties edits the selected effect’s parameters. Keep the effect separate so you can revise it later.
These concise guides follow the current web editor. Native controls may differ while the ports are being completed.
What you'll learn
- Find a filter by category or search.
- Edit its parameters in Properties.
- Control the effect with visibility, opacity and a mask.
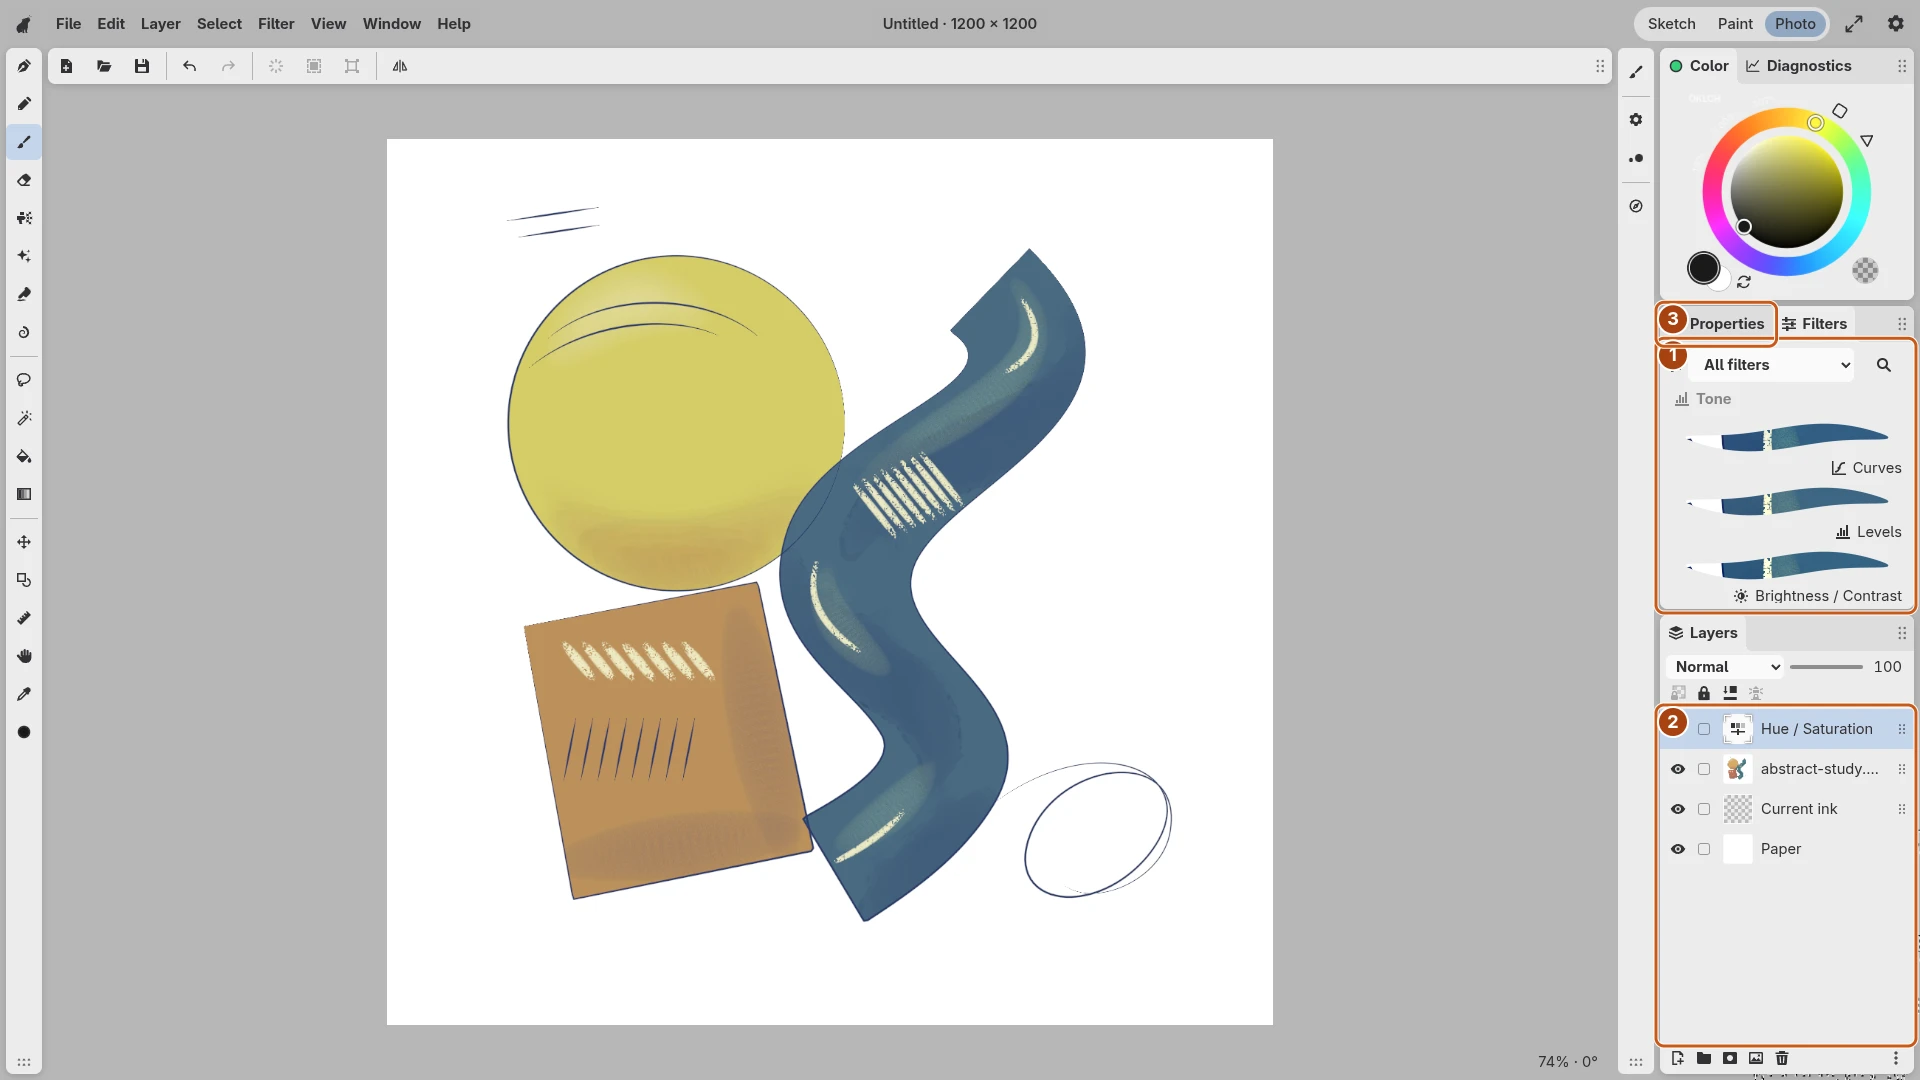
Open the image to inspect the controls. Numbered outlines identify the controls described in the caption.
Add an effect
Select the layer where you want to introduce the adjustment, then open Filters. Browse its categories or search for a name such as Curves, Hue / Saturation or Gaussian Blur. Choose a filter to add its effect layer.
Inspect its position in Layers: an effect’s place in the stack, group and clipping relationship determines what it changes. Keep unrelated ink or foreground details above it when they should remain unaffected.
Edit Properties
Select the effect layer and open Properties to edit the available controls. Different filters expose numbers, colors, curves or other settings. Change one parameter and compare the image before changing another.
Hide and show the effect layer to compare the adjustment. Lower its opacity when the whole result is too strong. The underlying paint remains separate, so you can return to Properties later.
Limit the adjustment
Use a mask to restrict the effect to part of the image, or a clipping/group arrangement to restrict its place in the stack. Check the result after changing the order of several filters: applying them in another order can produce a different image.
Continue with Edit an imported image for a short import-to-export workflow.