Shapes
Figure draws geometric marks on a paint layer. The shape and paint mode determine whether you get an outline, a filled area, or both.
These concise guides follow the current web editor. Native controls may differ while the ports are being completed.
What you'll learn
- Choose Line, Rectangle or Ellipse.
- Switch Outline, Fill and Outline + fill.
- Use brush size, colors and a pixel selection.
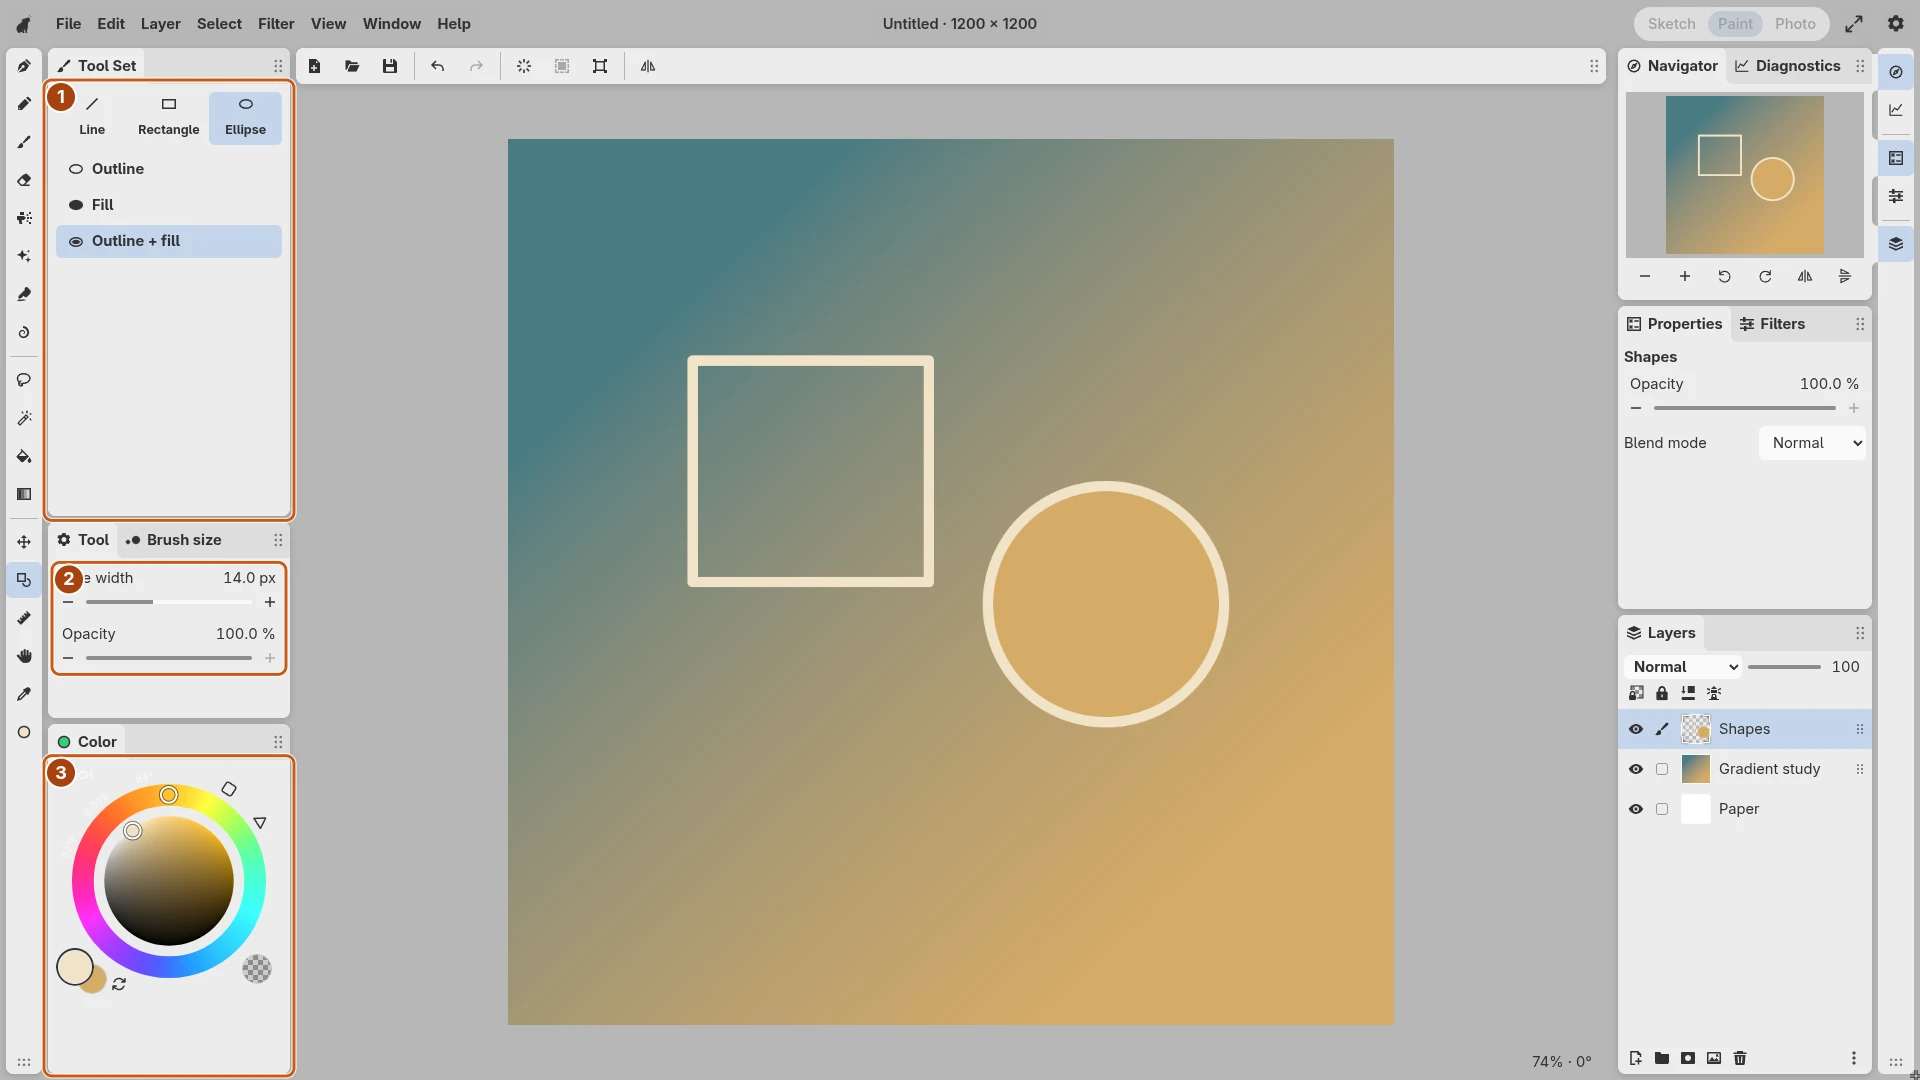
Open the image to inspect the controls. Numbered outlines identify the controls described in the caption.
Choose the shape
Select Figure and choose Line, Rectangle or Ellipse in Tool Set. Line draws an outline stroke; rectangles and ellipses can use Outline, Fill, or Outline + fill.
Choose the editing layer before drawing. A separate layer makes a shape easier to move or erase without disturbing the sketch below it.
Set its appearance and draw
Set brush size for the outline width and opacity for the mark. Foreground color supplies the outline or single fill. Outline + fill uses foreground for the outline and background for the interior.
Drag across the canvas to define the shape. Hold Shift to constrain its geometry, such as making an ellipse circular. Release to commit the mark. Undo and draw again if the bounds are wrong.
Combine with other tools
A pixel selection limits where the figure appears. Clear it afterward if the next stroke should cover a different area. To reposition existing marks, use Scale / rotate rather than drawing another shape over them.
For repeated freehand lines following a direction or vanishing point, use Rulers and snapping instead.