Edit an imported image
Photo makes image adjustments easier to reach. Importing an image as a layer gives it a place in the current document; opening a .capy project instead restores a complete editable document.
These concise guides follow the current web editor. Native controls may differ while the ports are being completed.
What you'll learn
- Import an image into Photo.
- Add an editable color adjustment.
- Save the layered project and export PNG.
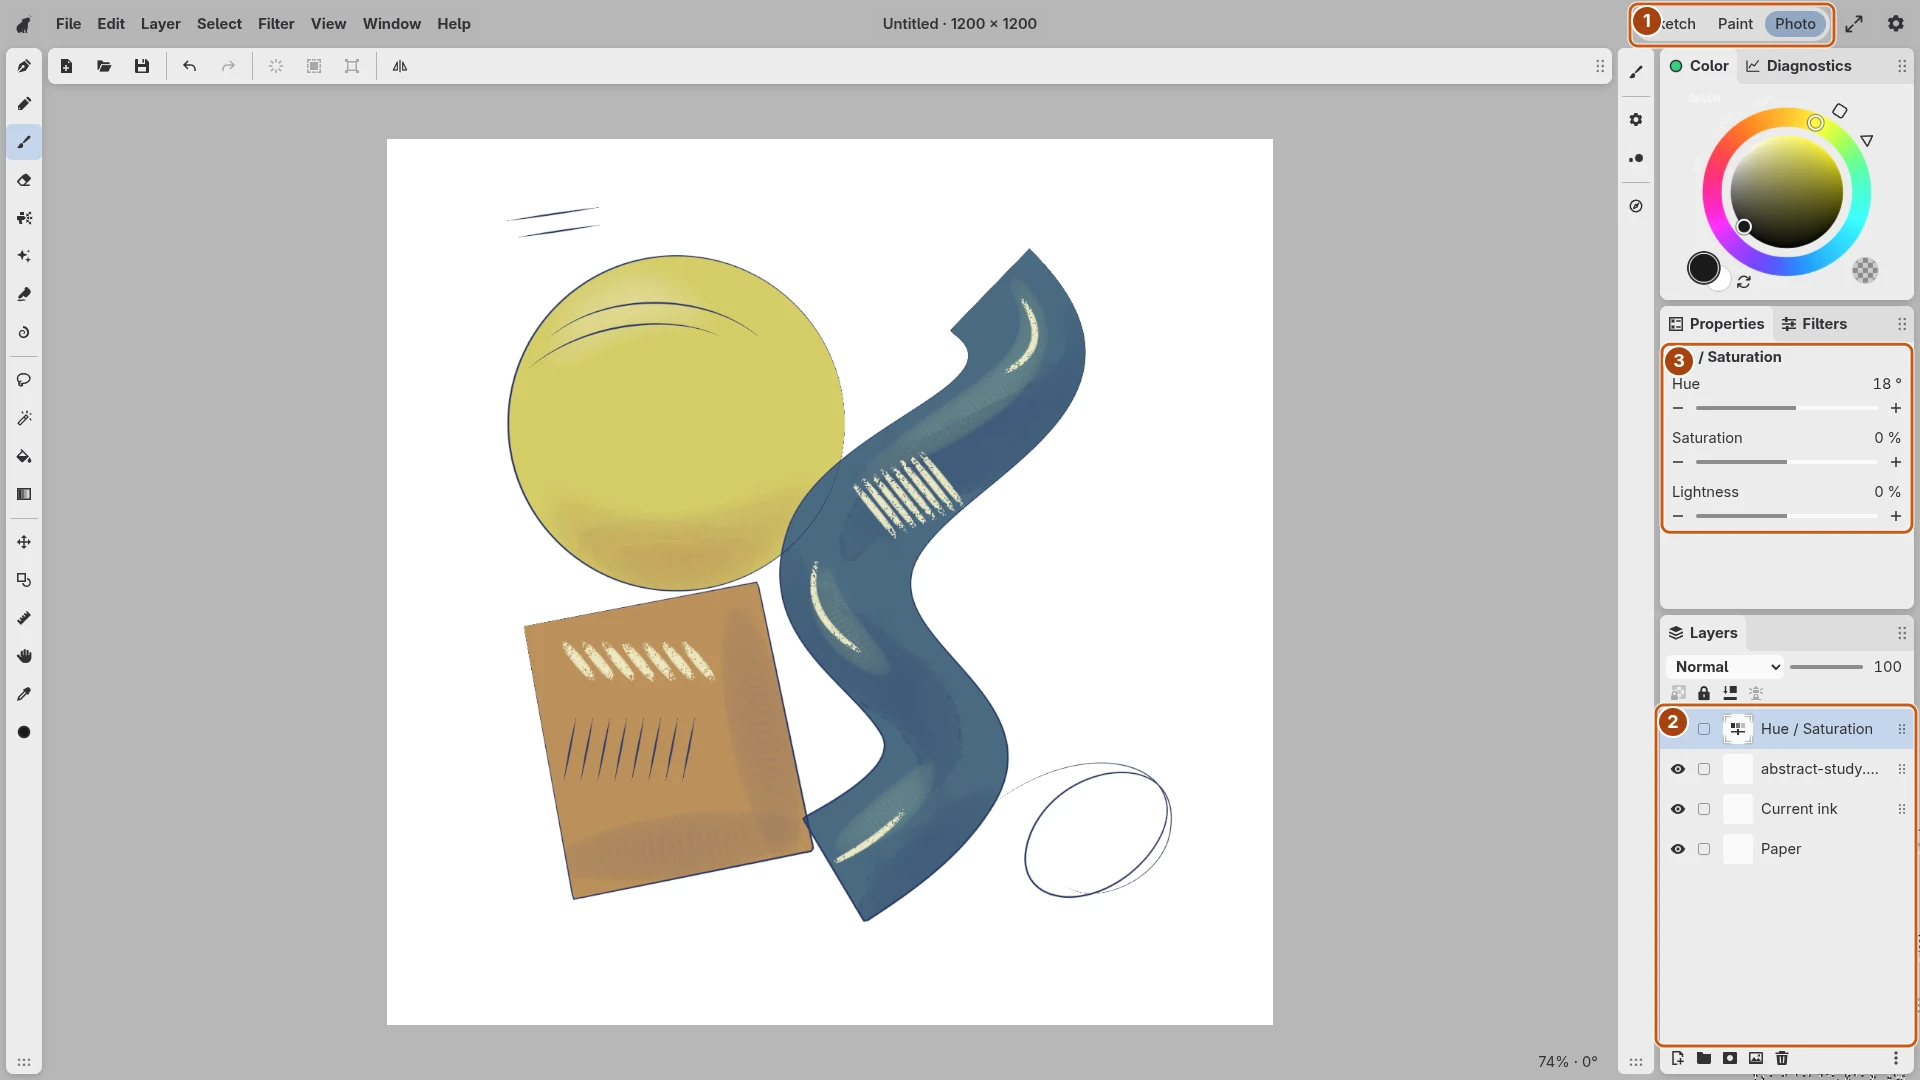
Open the image to inspect the controls. Numbered outlines identify the controls described in the caption.
Import into a document
Choose Photo and create a document at the dimensions you need. At the bottom of Layers, choose Import image as layer and select an image your browser can decode. It becomes a new image layer in the document.
Use Operation or Scale / rotate to position it. Importing a layer does not resize the document to the source image. Keep the original image file while experimenting.
Adjust the appearance
Open Filters and add a tone or color adjustment, such as Curves or Hue / Saturation. Select the resulting effect layer and edit its controls in Properties. Toggle the layer’s visibility to compare the adjustment with the original.
Add a mask if only one region should change. Keep unrelated content outside the effect’s scope by checking layer order, clipping and groups. Filters and properties explains that relationship.
Save and export
Use Save As… for a .capy project that retains the imported layer and editable adjustment. Use Export PNG… to make a flattened copy for sharing. Open the exported image to check its dimensions and appearance.
Photo is a workspace for the current shared tools. RAW development, healing and color-profile workflows are not part of this procedure.