Rulers and snapping
A ruler constrains a stroke while leaving the drawing on its paint layer. Straight, parallel and radial rulers provide different guides for repeated marks.
These concise guides follow the current web editor. Native controls may differ while the ports are being completed.
What you'll learn
- Create a straight, parallel or radial ruler.
- Turn ruler visibility and snapping on or off.
- Move a ruler or remove it after drawing.
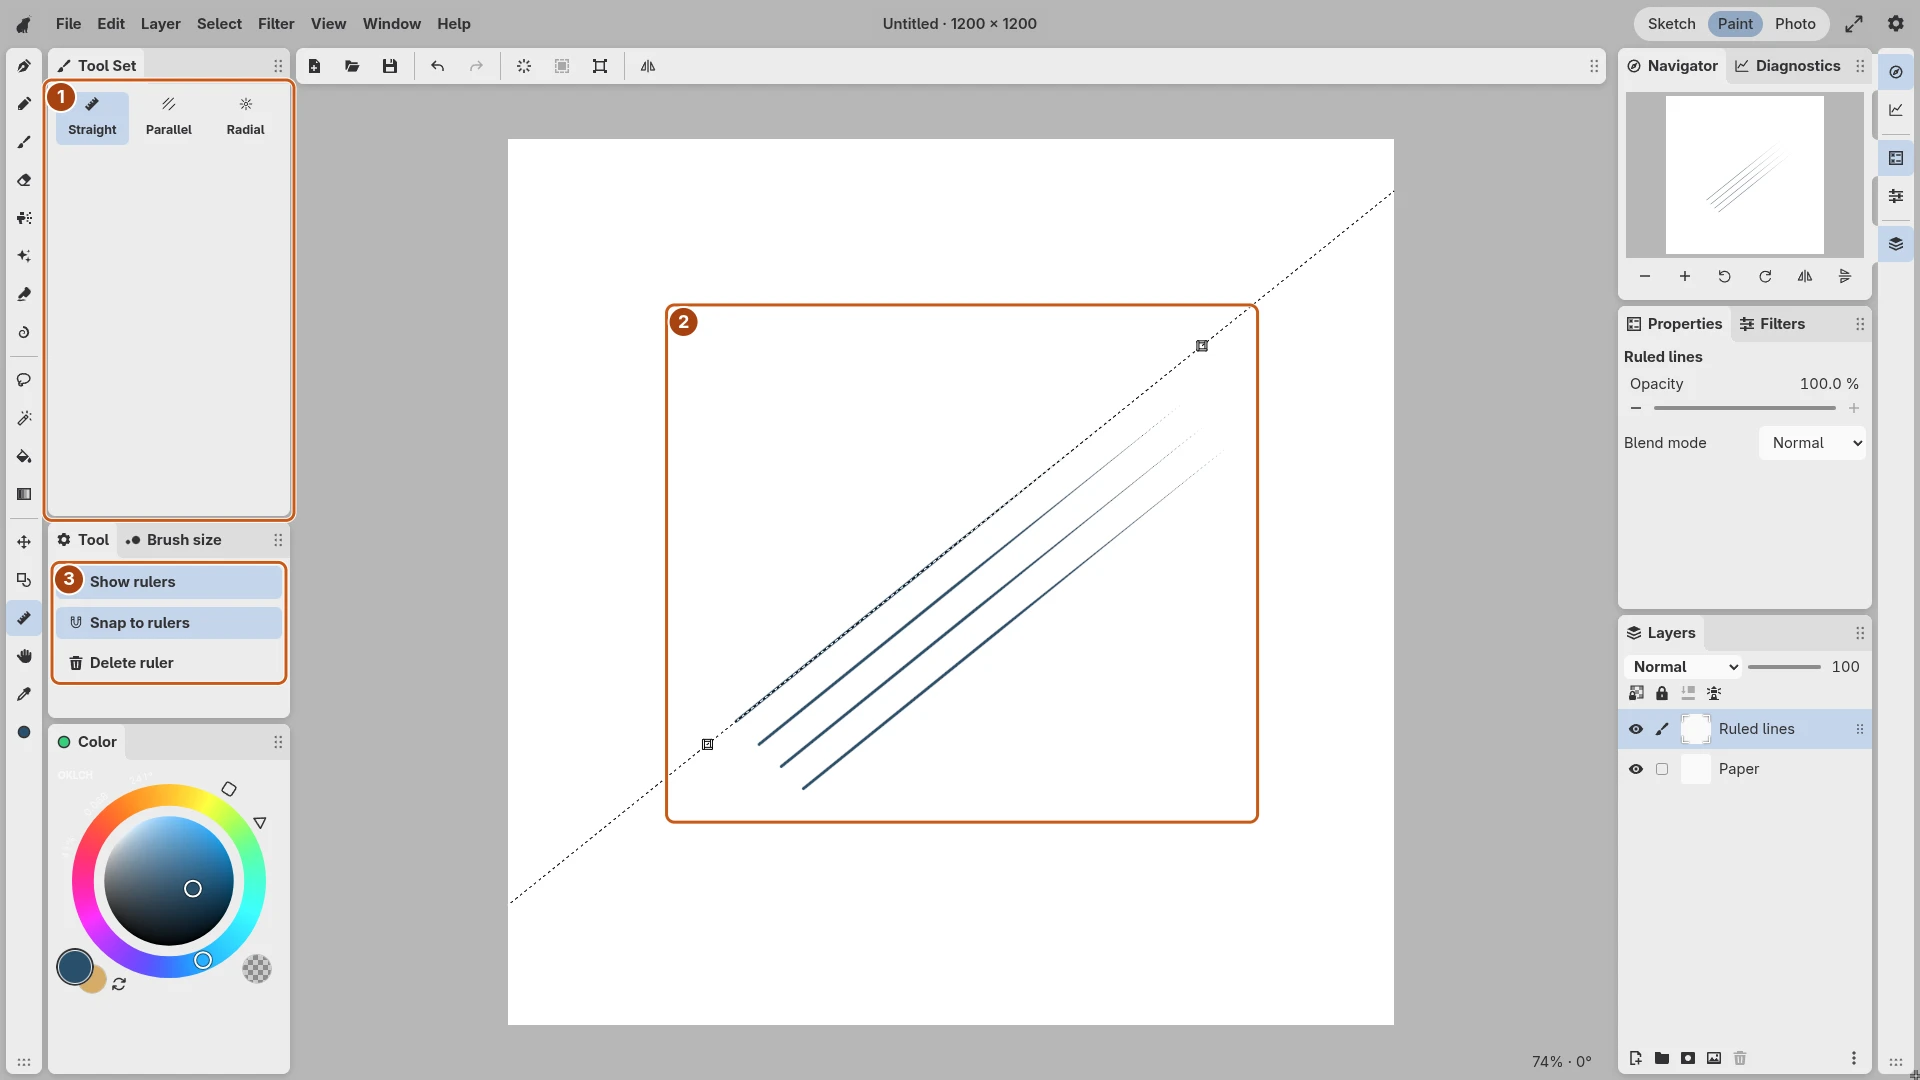
Open the image to inspect the controls. Numbered outlines identify the controls described in the caption.
Place a ruler
Choose Ruler, then Straight, Parallel or Radial in Tool Set. Drag to establish its position and direction. A straight ruler guides strokes along its line; a parallel ruler supplies a common direction, and a radial ruler guides lines toward its center.
Position the ruler where you need the constraint before switching back to a drawing tool. It is a guide, not an inked line in the exported image.
Draw with snapping
Enable Snap to rulers, then choose a pen or brush and draw near the guide. Brush size, pressure and color still determine the mark. Turn snapping off when you need unrestricted strokes beside the ruled lines.
Show rulers controls their visibility. Hidden rulers do not guide strokes, so check both visibility and snapping if the expected constraint is missing.
Revise the guide
Return to Ruler or use Operation to select and adjust a ruler. Move its body or an endpoint to change its position or direction. Delete ruler removes the selected guide while retaining the paint already drawn.
Use Figure for a single geometric shape, or transform when you need to change existing painted lines.