Gradients
Gradient creates a color transition on the editing layer. Its drag determines the transition’s direction and extent; a selection can keep the result inside a chosen region.
These concise guides follow the current web editor. Native controls may differ while the ports are being completed.
What you'll learn
- Choose linear or radial Gradient.
- Use foreground/background colors or fade to transparency.
- Limit the gradient with a selection or mask.
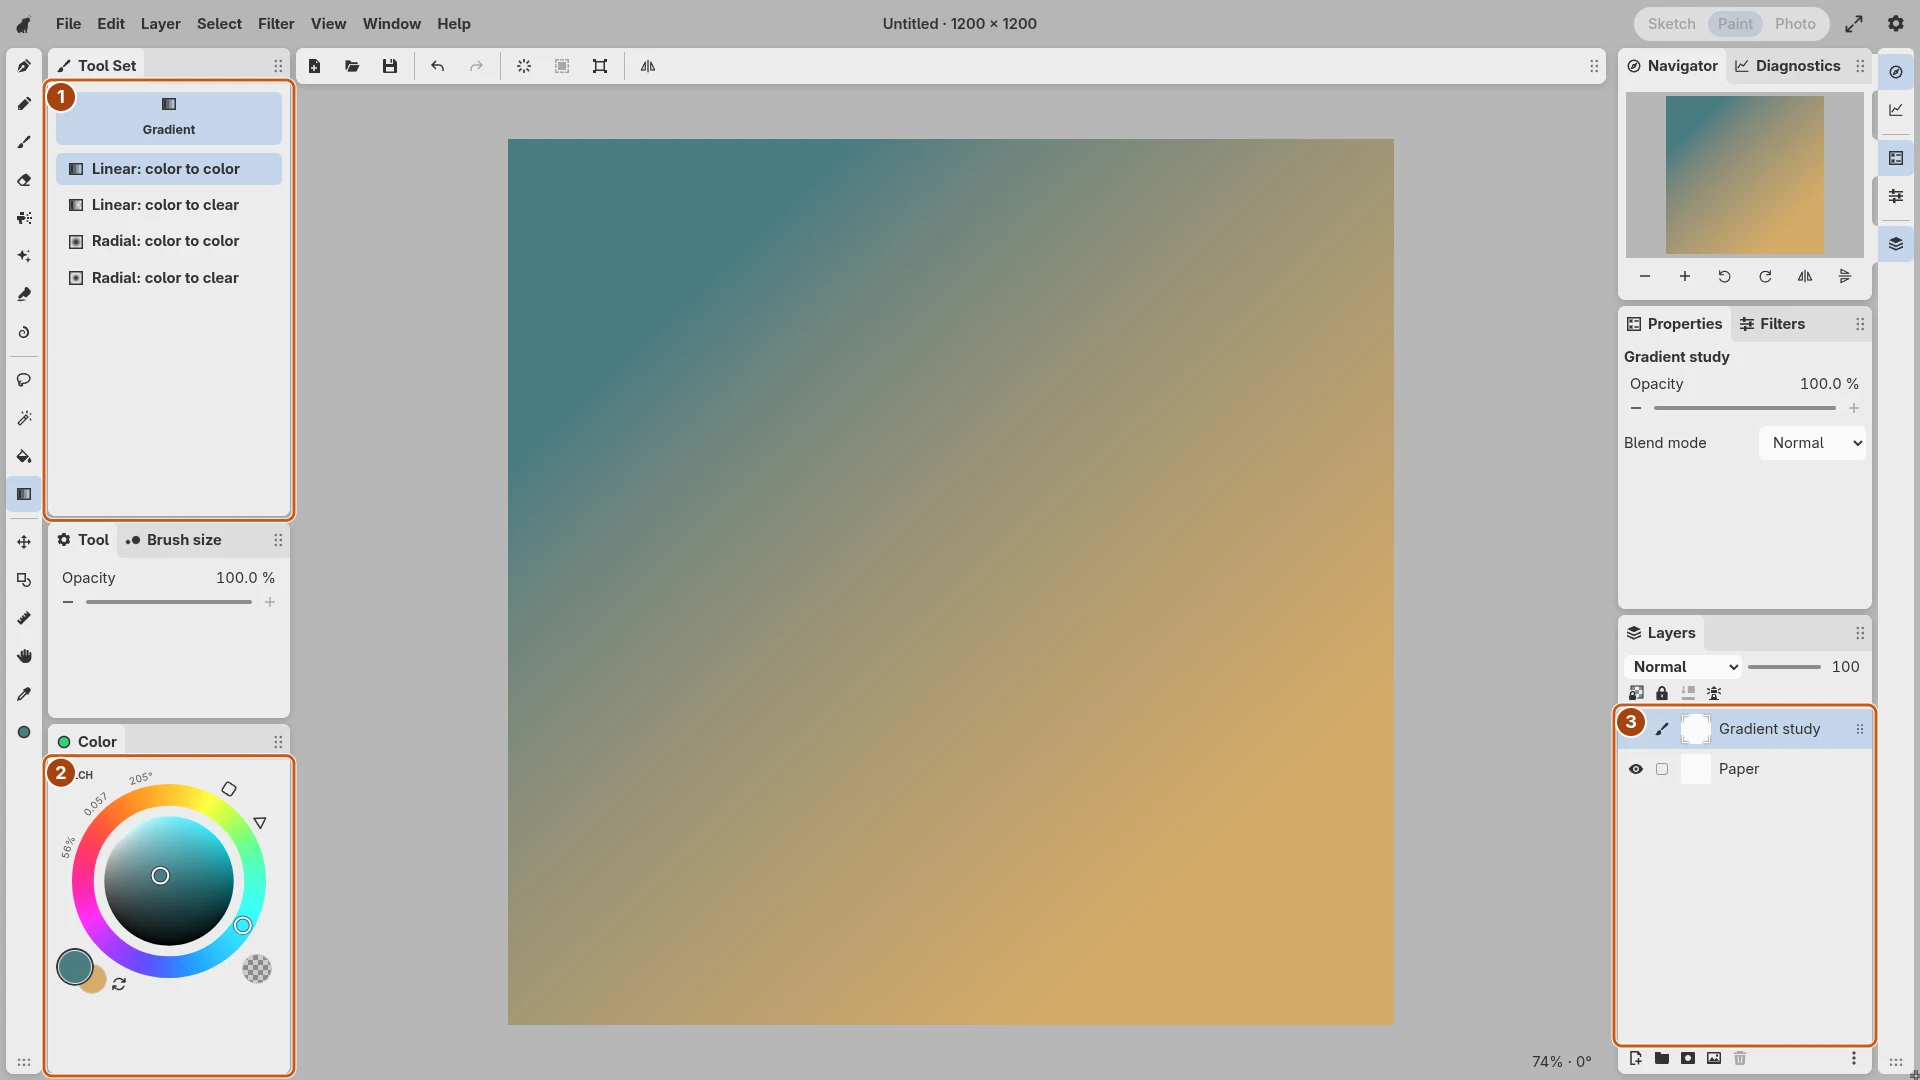
Open the image to inspect the controls. Numbered outlines identify the controls described in the caption.
Choose the colors and target
Add a paint layer for the gradient, or select the layer that should receive it. Choose foreground and background colors in Color. Use a selection when only one part of the layer should change.
Select Gradient, then choose its linear or radial variant in Tool Set. The transparent variant fades the foreground color into transparency instead of the background color.
Drag the transition
For a linear gradient, drag from its starting color toward its ending color. For a radial gradient, begin at the center and drag outward. A longer drag spreads the transition over more of the document.
Inspect the result at a useful zoom. Undo and repeat the drag to change its placement. Keep the gradient separate from ink or details that you want to preserve above it.
Refine its extent
Clear the selection after creating the gradient so later edits are unrestricted. Use a mask if the visibility boundary needs continued revision. A separate gradient layer also lets you adjust its opacity or blending without changing the base paint.
The Color guide explains the foreground/background pair and transparent paint.